Spring 2025 Project 08: Mechanical Choice Board

Abstract

For this project, we have been tasked with making a mechanical choice board for Claire, a 3 year old girl with Rett syndrome. The main goal for this project is designing something to act as a safe and effective method of communication between Claire and her caregivers.

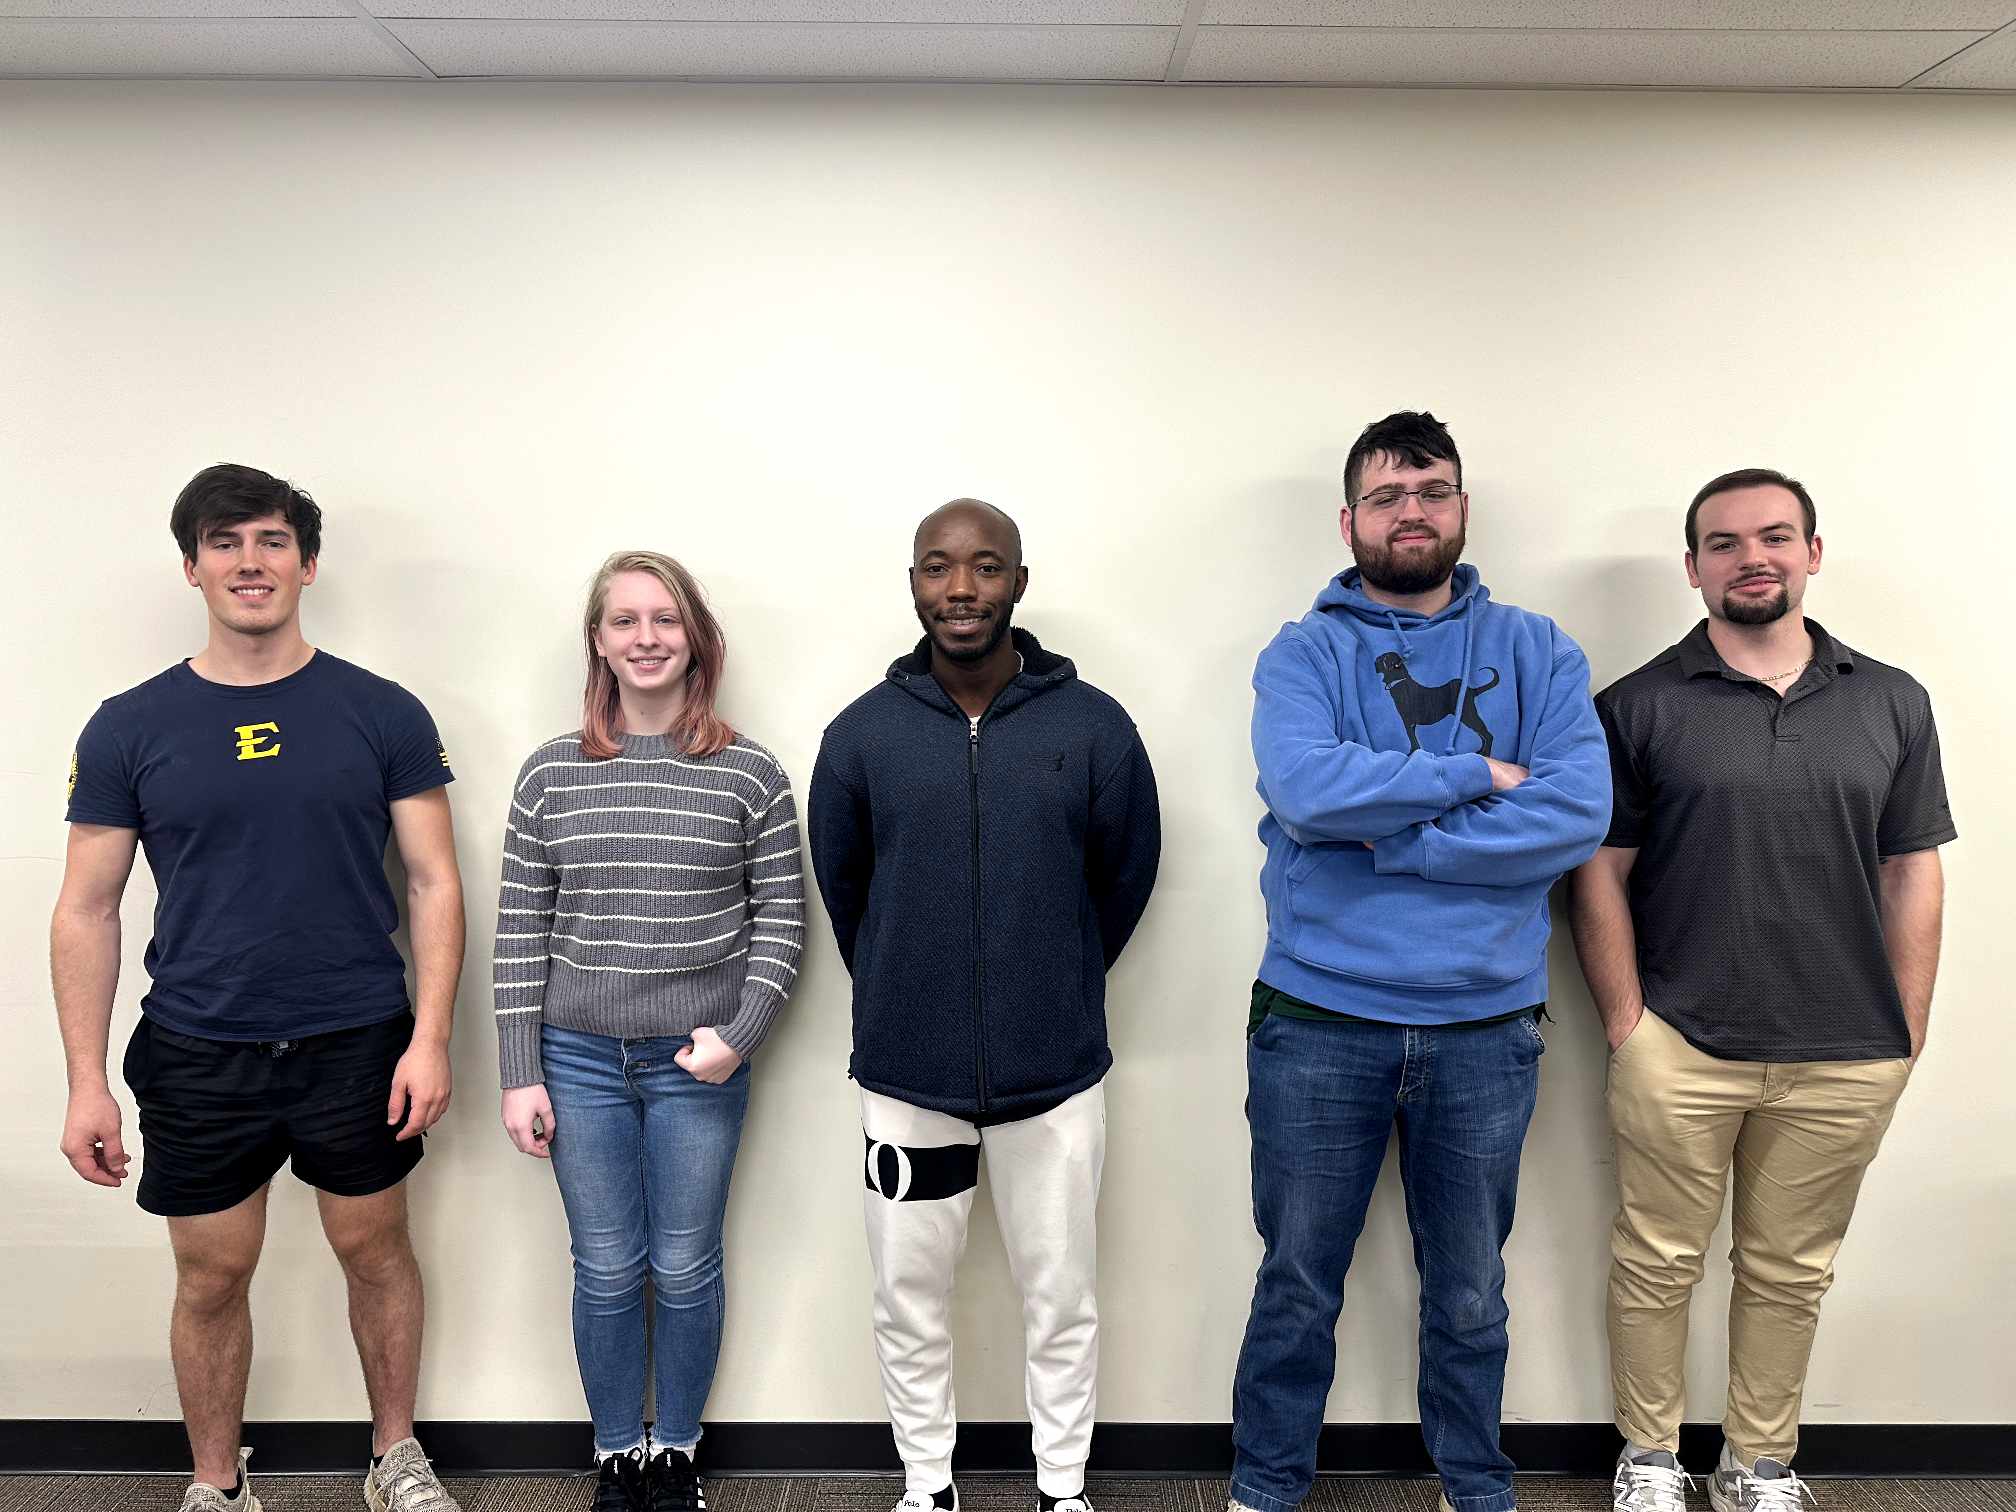
Jacob Jenkins, Julianne Barteck, Shamsideen Muhammad, Liam Walker, Blake Collier

Problem Statement

In continuance with the Fall 2024 project, we are creating a method of communication compatible with Claire, a three year old with Rett syndrome. Claire is a fully cognitively aware child with developmental motor skill issues making it difficult for her to communicate her needs. She currently has very little gross motor capability beyond head movement, and primarily communicates through head motion and eye gaze, although this will improve in the future. Our goal is to make a portable and customizable choice board for her to communicate with her caregivers in any environment, and to include features that will aid in her future development.

Design Specifications

  • Portable, relatively light weight, and small overall footprint so it can be taken up and down stairs and in public as needed.
  • Built sturdy enough to have a lifespan between 5-10 years or longer.
  • Suitable to Claire’s motor ability with room for future development: currently limited to control only of neck and head, with primary communication through eye gaze. No cognitive disability, and physical capabilities will increase with time and practice.
  • Interchangeable choices for Claire (Velcro, Magnetic, etc.)

Background Research

For our background research, we first started looking into the previous design that the Fall 2024 design team came up with. While we liked the idea of having a direct mechanical motion translation, we were informed that Claire would not be able to operate the device, so we discarded that idea. We also went online and researched a lot of choice board products on Amazon and other websites to help us form our concept designs. After speaking with Claire’s therapist, we all liked the idea of having a choice board that was effective as both a communication tool and an educational tool for Claire as she grows up. We took the inspiration of a large, rectangular board with interchangeable choices from our search, while also keeping in mind the added challenges of Claire being immobile and not having good motor skills due to Rett syndrome.

Concept Design 1

This design was inspired from both a traditional choice board and the TN Tech 2024 team’s design for the choice board. The idea here is to have a board that can fold in 4 different directions with choices on the front and backs of the panels.

Concept Design 2

This design was inspired by typical fabric crinkle mats for children. It provides 4 interchangeable options, an “other” choice, a “STOP” button, and yes/no selections. It also offers two methods of choosing an option: one for her current ability (a headband with a laser pointer) and one for the future (soft buttons to hit), as well as bells to catch the attention of a caregiver.

The interchangeable options are intended to be attached and swapped using Velcro (or a similar hook-and-loop attachment), and their displays will include a simple, brightly colored picture to represent the option as well as a simple sight word.

Concept Design 3

This concept involves a large, 36″ long by 24″ wide wooden framed choice board with 8 pictures of various daily emotions Claire might experience such as ‘I’m hungry’ and ‘I’m thirsty’. These pictures are easily interchangeable by Claire’s caregiver via velcro strips placed along the board. There is also an LED indicator below each picture that corresponds with a button on a controller for Claire to use as she grows older. These indicators would be hard wired to the controller. Due to the lack of Claire’s motor skills, these buttons would be big and easy to press for her as she became more accustomed to using them. As she is only 4 years old right now, it is possible that she could use a headband with a laser pointer attached to make the choice board more accessible until her motor skills became more refined.

The wooden choice board sits on a wooden easel. This was designed in this way so that Claire’s caregiver can set up her choice board close to where Claire sits, whether its downstairs or upstairs in her house.

Selected Concept Design

The decision matrix for the choice board concept designs is shown below. We chose categories of Education, Cost, Durability, Portability, Communication, and Simplicity. While designs 2 and 3 were rather close, design 2 narrowly beat out design 3 with a score of 15. As such, we will be pursuing the fabric choice board as our design.

Decision Matrix

Overview of Selected Design

Design 2 is a 19 by 27.5-inch board made of soft cotton fabric, featuring six 5 by 5 inch and two 3 by 5 inch Velcro-attached panels to hold visual choices. We will also be attaching a lightweight pointer to a Peppa Pig-themed hat that Claire can wear to help her point to specific choices on the board.

Describe Design Details

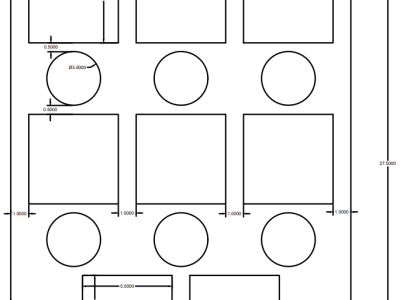
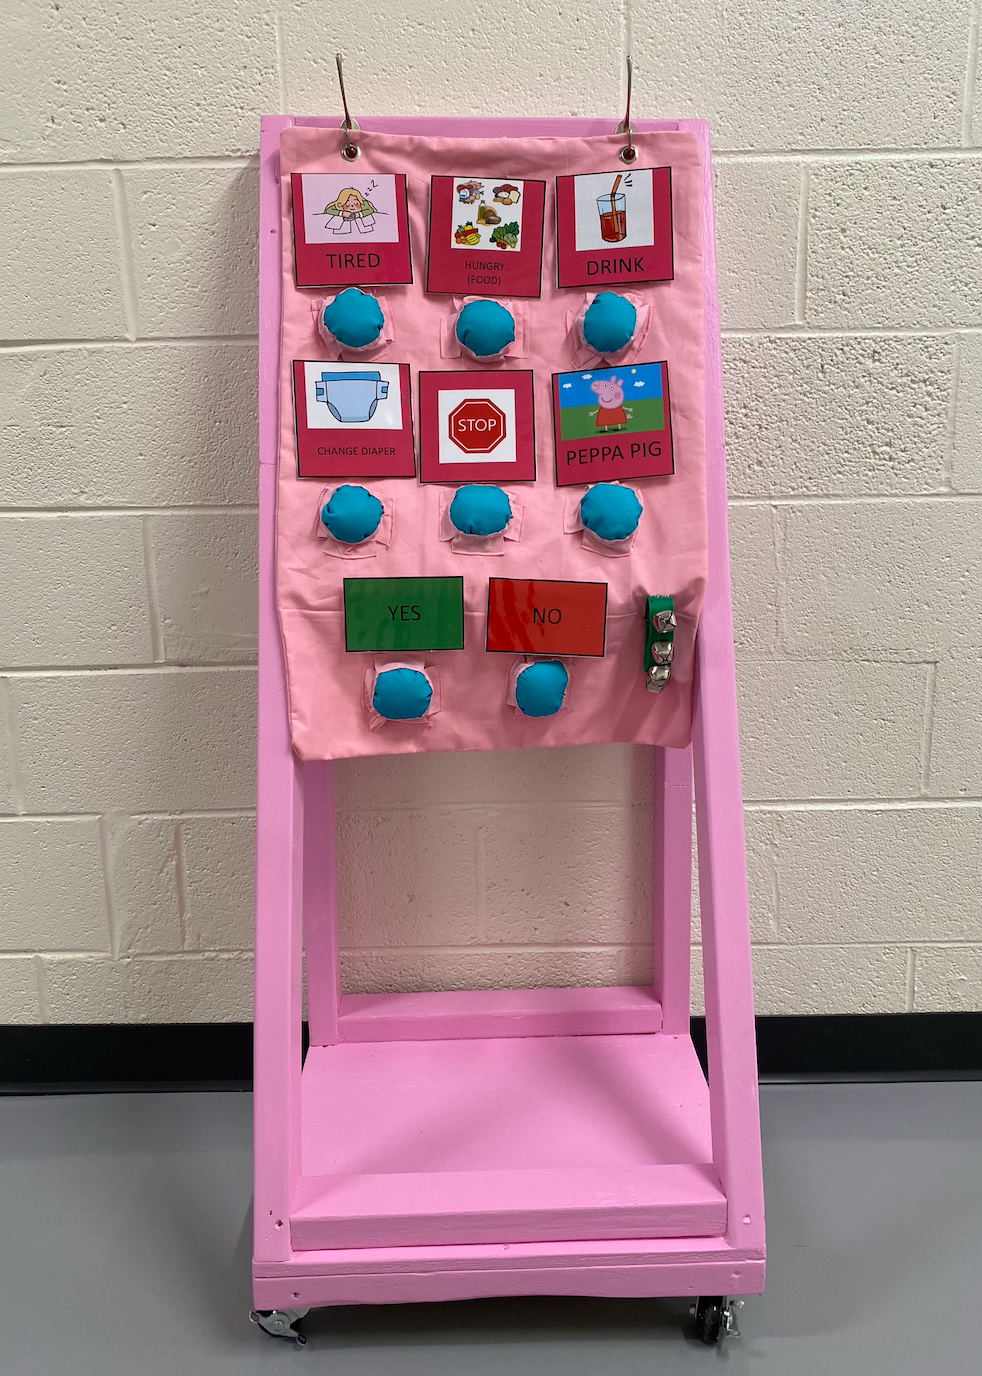
Design 2 features a 19 by 27.5-inch main board made of soft, lightweight cotton fabric, making it more gentle, easy to transport, and washable (hand washing and air drying recommended). The board includes six 4 by 5-inch Velcro slots spaced 1 inch apart, allowing for customizable visual choices that are easy to attach, remove, or rearrange. Directly below the slots are 3-inch circular buttons positioned 0.5 inches above and below the slots. At the bottom are two 3 by 5-inch rectangular panels for “yes” and “no” responses, providing a clear, structured layout for communication. The entire board is foldable and compact, making it convenient to carry or store.

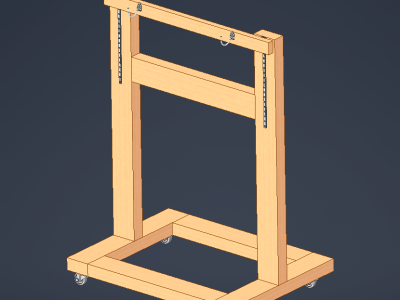
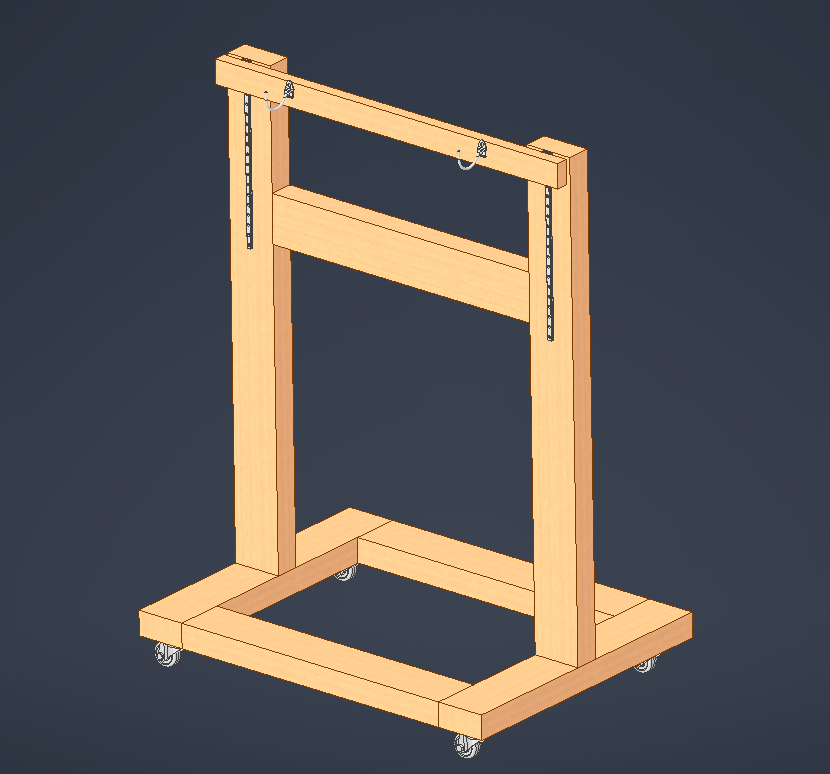
This design also includes a sturdy, wood framed easel with lockable casters on the bottom for mobility. The easel includes linear bearings with carriages that allow Claire’s caregiver to adjust the height of the choice board. This will allow Claire to use the choice board as she grows older and also adjust the height of the board based on where Claire is sitting (floor, chair, etc.).

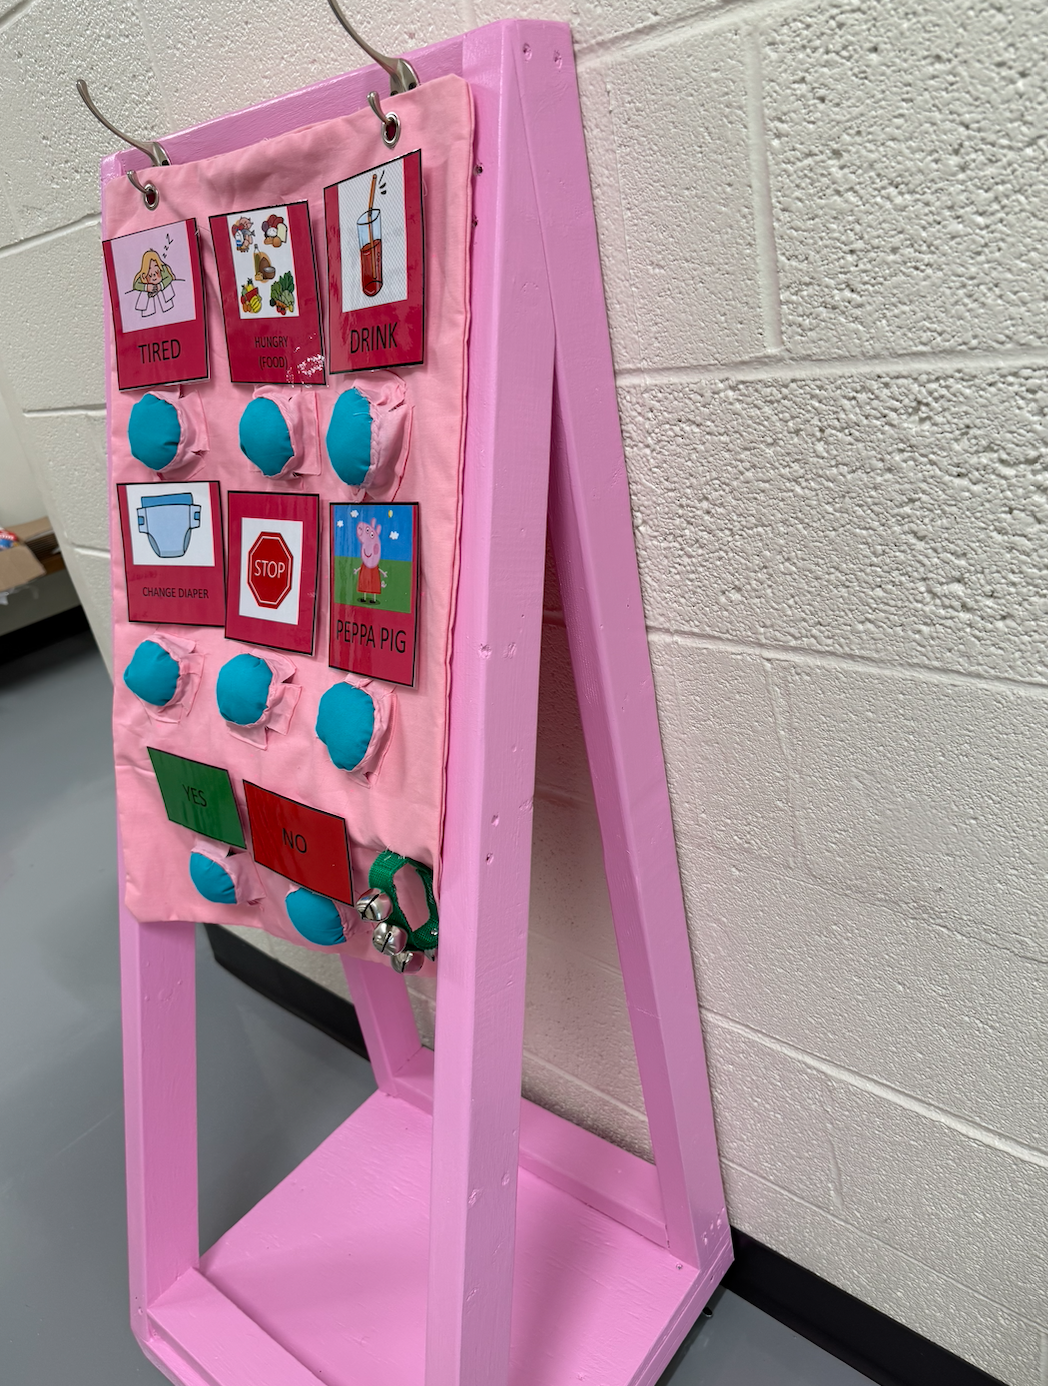
The panels will be made of laminated cardstock, with options of: 2 blank options, TV, Stop (for siblings), Hungry (Bottle), Hungry (Food), Drink, Change Diaper, Tired, Peppa Pig, and Music. There will also be default Yes and No selections. These will have both sight words and basic images on them to facilitate Claire’s learning. The buttons will be stuffed enough to be firm but with some give to make pushing entertaining. There will also be bells attached to the board to allow Claire to audibly gain attention.

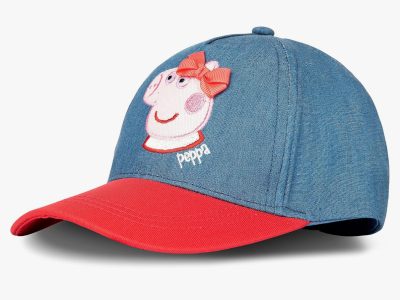
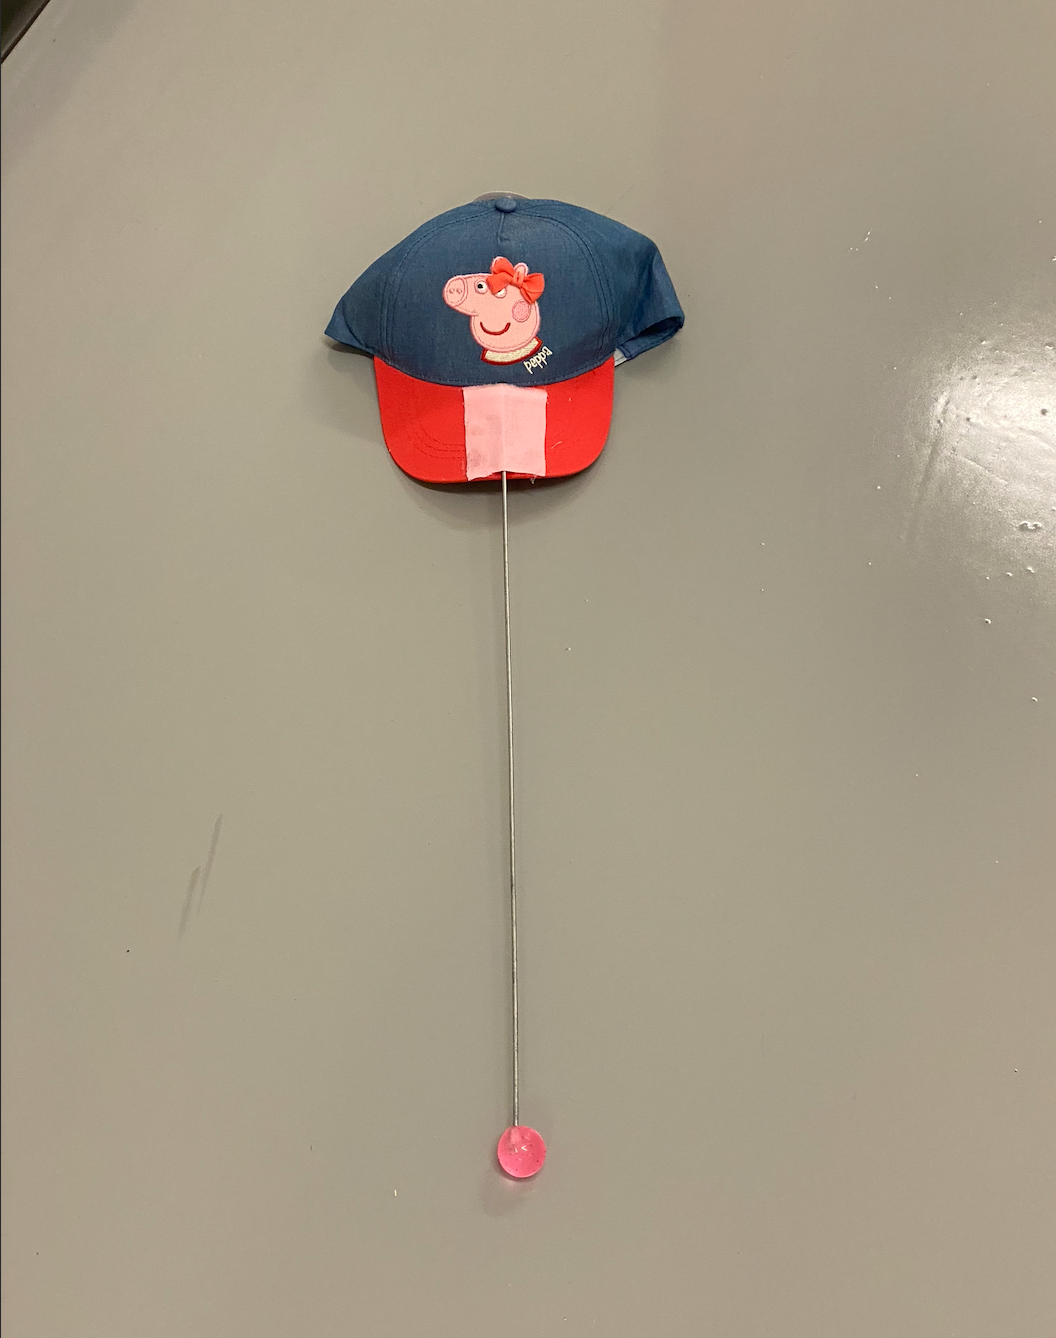
To allow Claire to select an option in her current state (still learning to direct her fists enough to use them for this), we also have designed a cap with a 18-inch wire attached. The wire has an endcap for safety, and Claire can then use her head to indicate the desired panel.

Overall, this design emphasizes simplicity, comfort, and functional communication tailored specifically to Claire’s needs.

Engineering Analysis 1

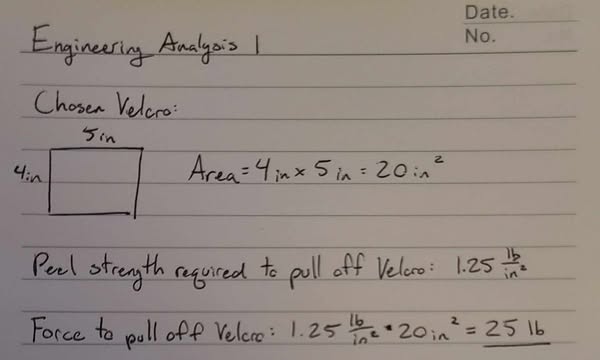
Engineering analysis of force required to peel a Velcro-attached picture off of the choice board. The 4×5 area of Velcro requires a peel force of up to 25 lb, so the panels will not fall off when Claire bumps them. Our team used technical data from January 2011 from 3M for standard hook and loop fasteners.

3M Data

Engineering Analysis 2

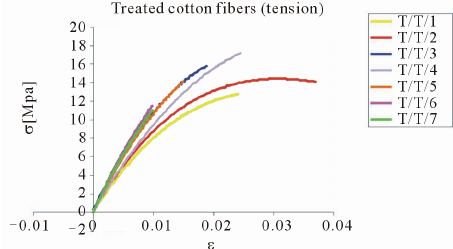
Cotton has a modulus of elasticity between 5-13 GPa. It takes up to 133 Newtons to tear. In perspective a human’s max grip strength reaches up to 50 kg / 400-500 Newtons on average. Despite this, we chose to have use cotton for the main board considering that it is kid friendly, allergy friendly, and soft. Care should be taken when changing the Velcro slots to avoid , some caution will need to take place to prevent the main board from ripping. However, 25 lb of peel force is equivalent to ~111 N, which is less than the 133 N limit, so careful removal should be all that is required.

Modulus of elasticity of cotton

Tear strength of cotton

Grip strength

Stress-strain curve

Engineering Analysis 3

This engineering analysis provides insight into the deflection of the wire due to the weight of the end cap. By treating the wire as a cantilever beam, we found the deflection to be 2.4 inches in the downward direction. This is less than half the side of a panel, so Claire should still be able to accurately use the pointer. This applies specifically to the craft wire with a ball end, not the conduit with rubber end cap.

CAD Drawings

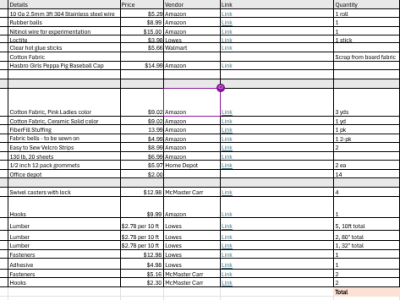
Bill of Materials

Document Fabrication Process

Board

The mat of the choice board was sewn together using a sewing machine, and components were similarly attached. However, the buttons and their skirts were assembled using hand stitching due to their unique shapes. For the mat, three large sheets of cotton fabric (19 x 27.5 inches) were sewn together – this created three layers for a thick, durable surface that was flexible but stable. Two holes were punched near the top for grommets to be placed, allowing the choice board to be hung on the easel. Rectangular Velcro patches were evenly stitched throughout the board and their backside glued to the cards, allowing cards to be interchangeable. The buttons below each choice are filled with stuffing to operate as an alternative option to interact with the choice board when the hat with point is not used. This is hoped to contribute to Claire’s development Lastly, we also attached a loop with bells that Claire can use to get attention.

Easel

The easel was assembled using wood, 2 hooks and 4 wheels at the base for mobility. There were some modifications that were made to the easel compared to the initial design. Rather than having the easel be completely vertical, we decided to add two inclined beams for more strength and stability, ensuring it would last longer. The wood planks were screwed together, then we added the hooks on the tilted planks. Once the major components were put together, the wood was sanded all around, adding a smoother feel to it. Finally, we added primer and a custom coat of pink paint to give the board a nicer look.

Cards

The cards were all designed on a word document using some ‘cartoonish’ stock photos with the choices worded directly below the images. This is intended to allow Claire to both use the board immediately and also contribute to her development in understanding and reading sight words. Two of the cards were left blank so they could be written on with a dry erase marker. They were then laminated and attached to velcro patches that would stick to the board.

Hat with pointer

The hat we chose was Peppa pig themed because it’s Claire favorite cartoon. For the pointer, we attached a small rubber ball to one end of the wire then super glued the wire to the top brim of the hat. This prevents safety issues from an exposed wire end, as well as making it more clear where the wire points. After the glue dried, we added a patch of fabric to the top to both conceal the wire attachment point and act as an extra fastener for the wire.

Testing Results

In the video you can see one of our group members (Blake) interacting with the choice board using the hat with pointer. From a seated position he was able to both use the pointer to clearly make choices on the board and ring the bells without using much body movement. When sitting upright, the wire length is long enough (18 inches) to easily point to any options on the board when hung up on the easel, but not too long to the point that the hat becomes uncomfortable.

Completed Design Photos

Instructions for Safe Use

  • Do not push the ball hard against the wire (it will puncture)
  • While using the hat with pointer, do not use too much force against hard surfaces
  • Choice board should be hand-washed and air-dried
  • For ease of use, do not use the easel on inclined surfaces
  • If you decide to make new cards, make sure they are 5 x 5 inches to fit on the choice board. (Yes/No cards are 5 x 3 in)

Project Summary/Reflection

Prior to speaking with Claire’s parents, or her therapist, when we were first given the task to create a mechanical choice board for her to use as a form of communication, most of us had an idea that whatever we made would have a lot of moving parts and gears involved. After all, in this class was focused on ‘dynamics of machinery’ so we had assumed we would be putting all those lessons into action, however, most of us had not even heard of Rett syndrome. After getting a better understanding of who Claire is, and how she would be using this board, this project went from another assignment to a real-world problem an engineer is asked to solve. We had to throw away our preconceived ideas of what we should make, and started brainstorming, from the bottom up, ways to make something that would better suit Claire’s needs.  Our project may not have incorporated all the lessons we learned in this class, but we came together and problem-solved to make something that hopefully will have a real impact on someone.

Semester

2025 Spring