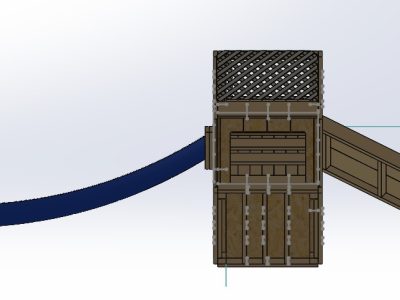
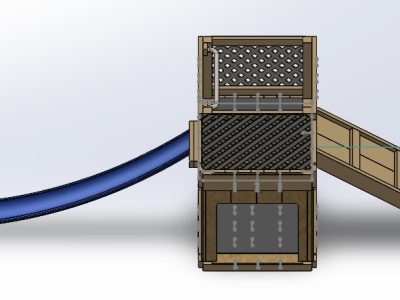
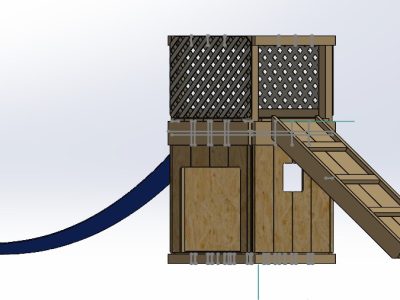
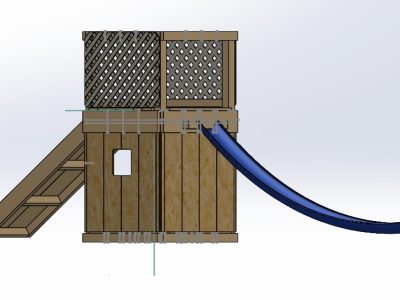
We are working to provide Alivia, a kindergartener with cerebral palsy at Findlay Elementary School, with some sort of play area that is accessible to her wheelchair during recess. Alivia wants to be able to play with her fellow students but due to mulch and no ramps, she is not able to. We are creating a play area that must have a large enough platform for Alivia’s wheelchair to move around and some stations/activities that get her involved with her classmates. We learned that Alivia is very capable of moving without a wheelchair and loves the normal playground activities such as slides and playing house.
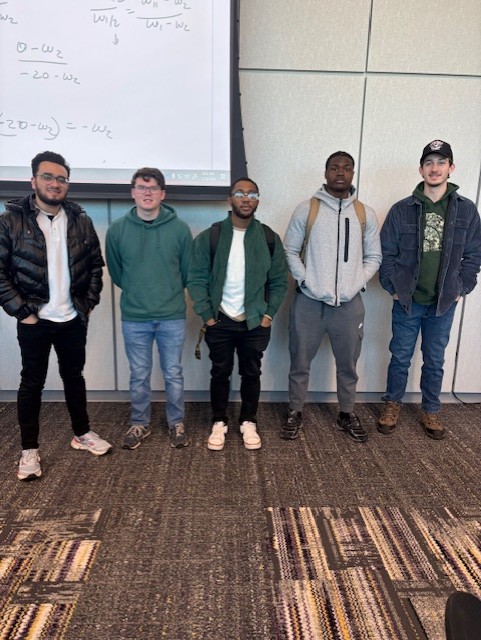
Shreyansh Gajjar, Ethan Scully, John Craw, Richard Bryant, Seth Friddle
Problem Statement
We want to design an engaging and easily accessible play area so Alivia, a student with cerebral palsy and in a wheelchair, can be socialized with her peers during recess. It needs to be easily deconstructed and moved along with lasting the wear and tear of the weather and elementary students.
Design Specifications
This must be able to be broken down
Must be able to be outside for a long time (i.e. weather, use, etc.)
Must be easy to transport as it will be at a new playground once Alivia moves to 1st grade
Engaging
Easy Wheelchair access
Background Research
Because we really only need to follow a couple of guidelines, there is a lot of creative freedom with this project. Originally, we didn’t fully understand what we needed make. Was it a handheld toy? Was it a one-on-one toy? These a lot of meanings behind “adaptive”. After getting some input though, we realized as long as it’s large, easy to deconstruct and transport, easy on wheels, and engaging for both Alivia and her peers, we have some free range on what’s being engaged with. We also looked at different options for the stations as they appeal to different types of people. She also loves slides, playing house, and climbing as the product only needs to be easy to access for her wheelchair. After she is at the product, she is able to climb and move around by herself.
Concept Design 1
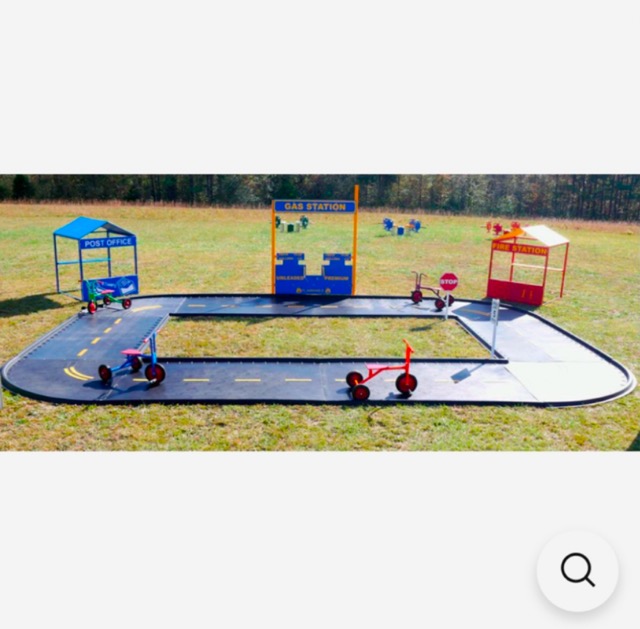
With this design, we decided to go with a large play and a more artistic feel. We included the musical stations assuming Alivia likes to listen to or play music. We also wanted to create some sort of outdoor chalk board that appeals to Alivia’s artsy side while also finding a good way for her to engage with her classmates. We wanted to do a layered platform that has rubber for weather resistance and wheel traction while the plywood is for structure. This also has a ramp for easy access for Alivia. It is in sort of puzzle shapes to that make for easy deconstruction when it needs to be moved to the next playground. We also thought about some slight curve to the platform’s surface acting as a way to deflect water just like soccer fields do to prevent standing water and provide faster drying.
Concept Design 2
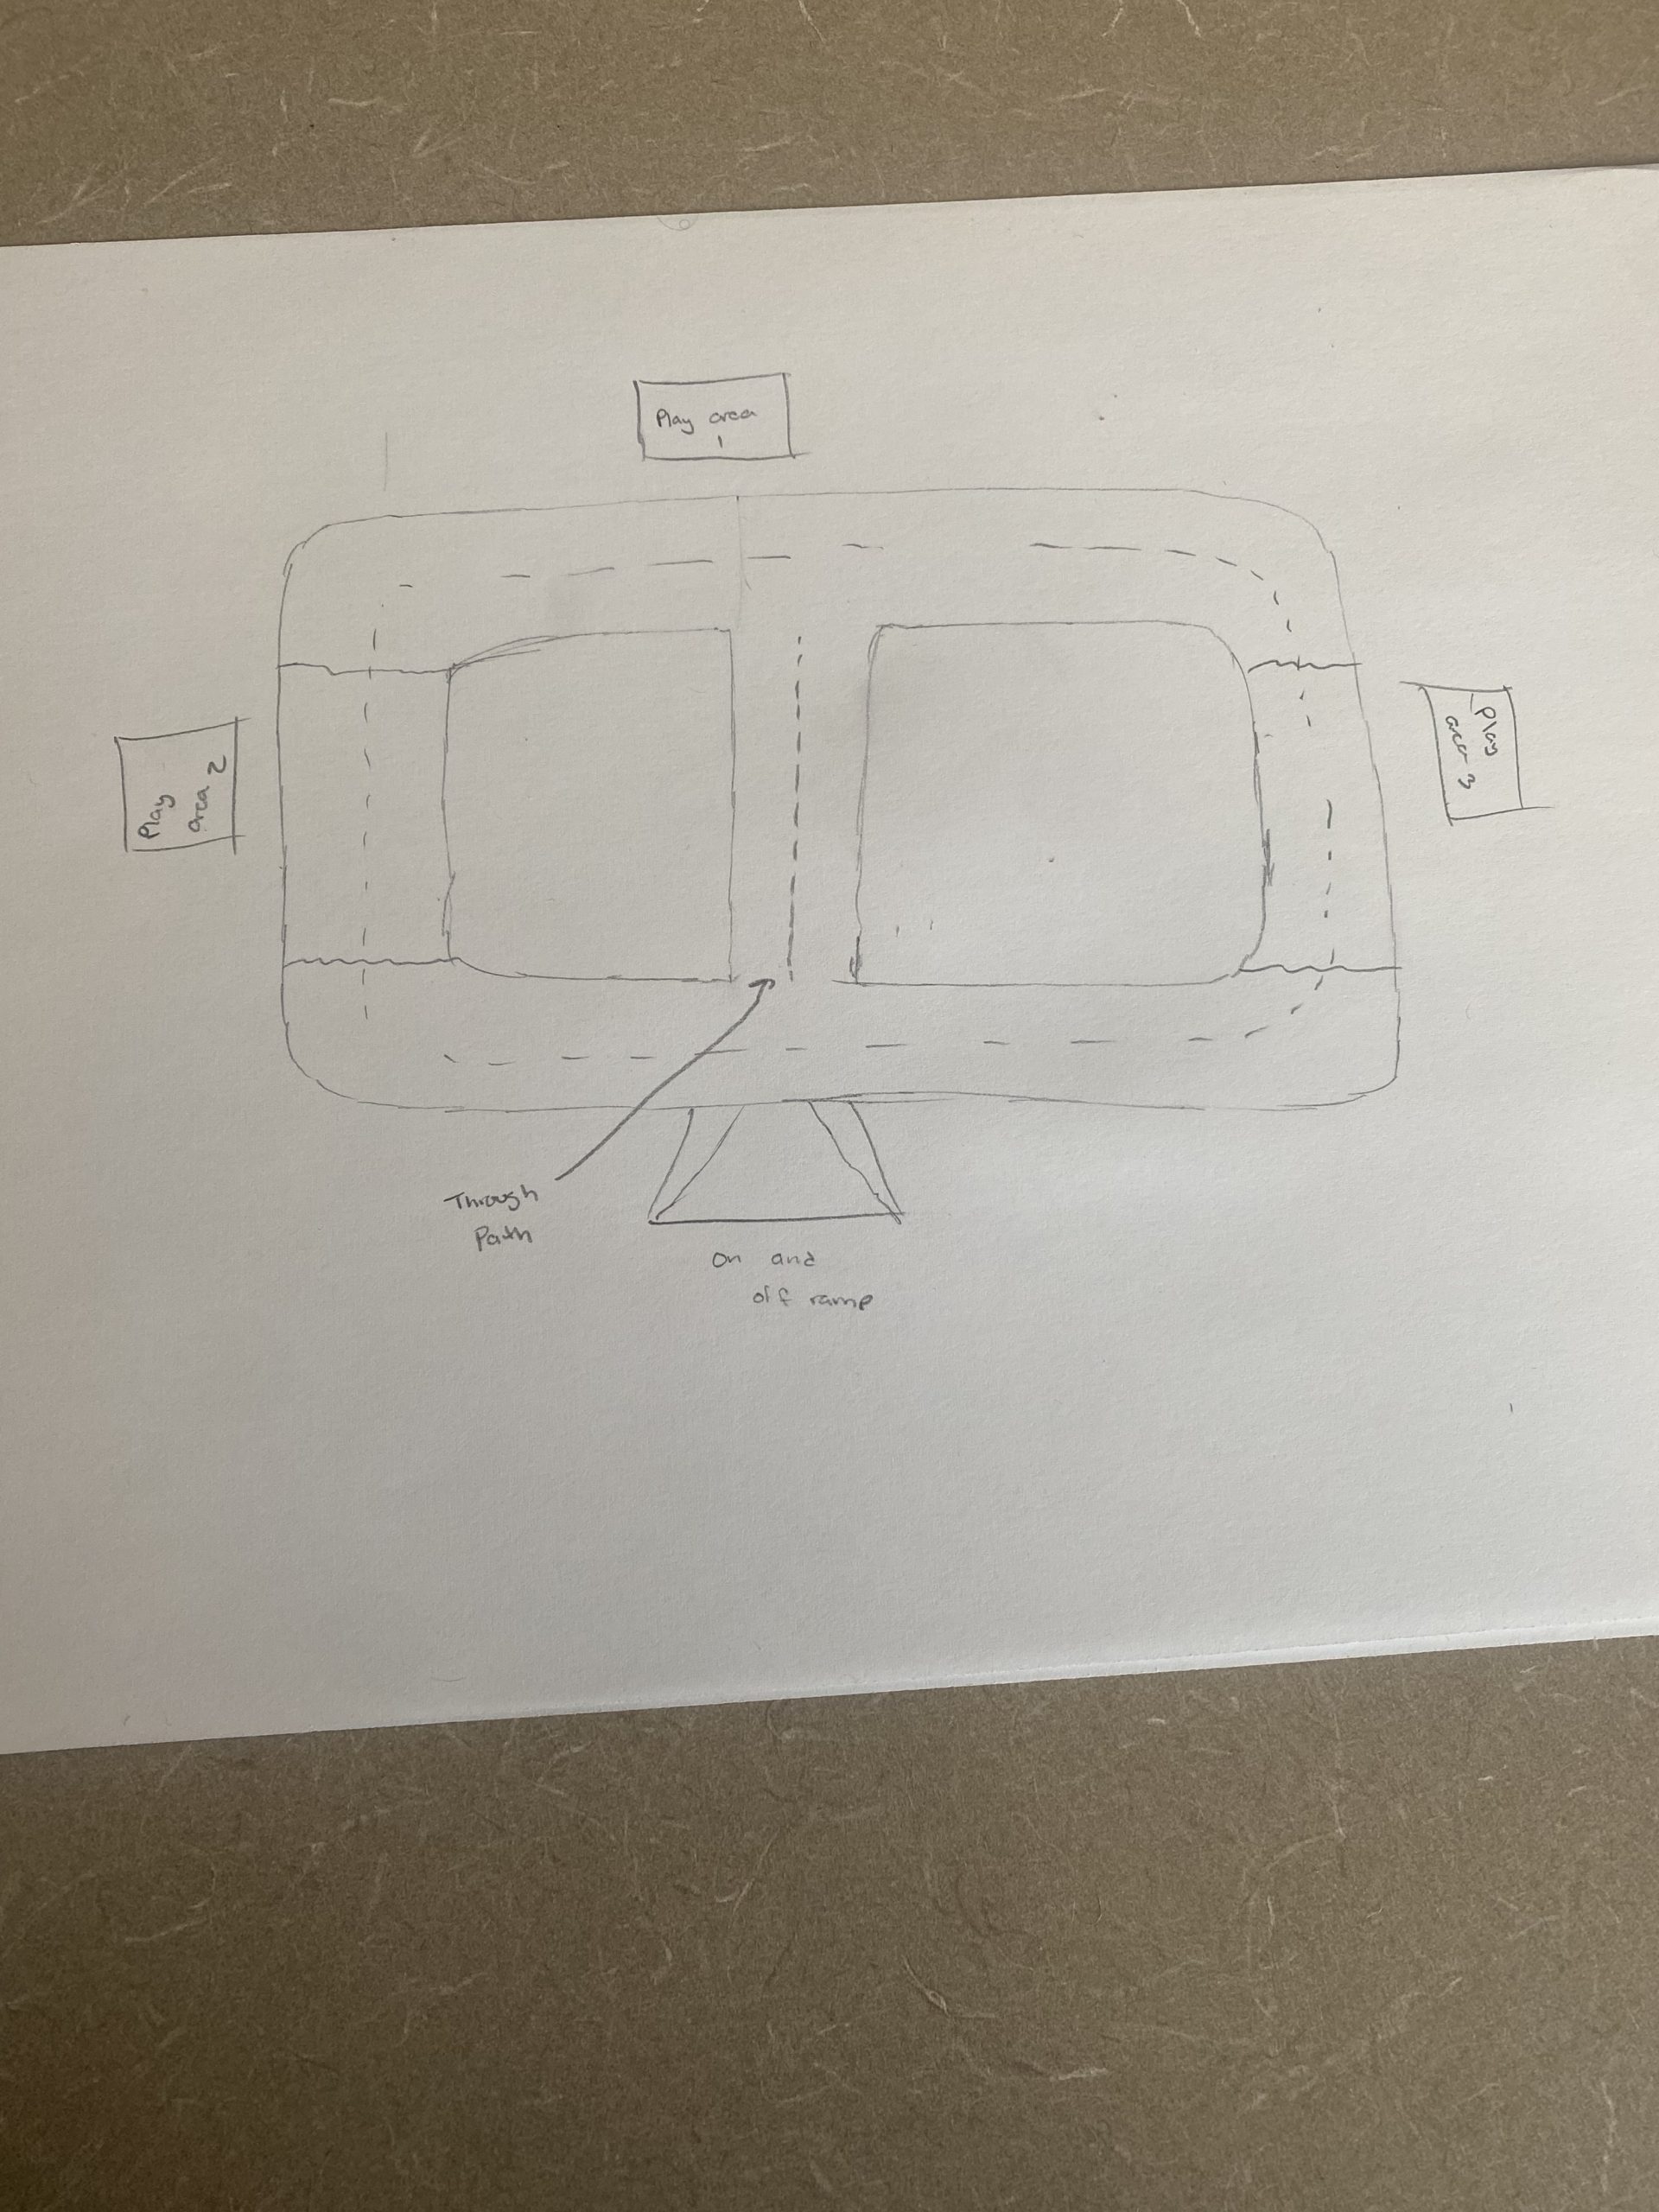
For this design, we wanted to reduce the cost from the platform while also keeping a larger feel with a cut through the middle of a circular shape. The layered platform mainly stays constant with our designs. The play areas within this design are mostly custom made to fit what Alivia likes and what she would want to do with her classmates. Again, there’s a ramp for easy wheelchair access.
Concept Design 3
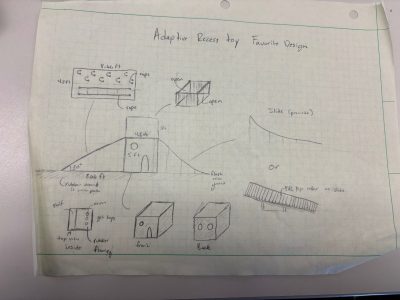
This design fits more to if Alivia is the adventurist type as we’ve provided some her favorite playground activities such as a slide, playhouse, and climbing wall. She can crawl really well and has good upper body strength, so we wanted to create the wall. With the wall we needed make sure it’s not too steep though. The slide also must go to the ground completely.
Selected Concept Design
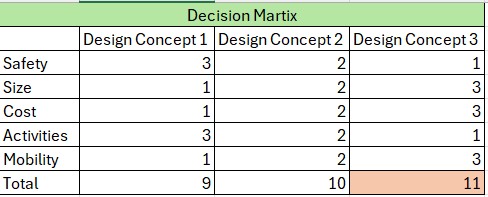
From our decision matrix, Concept Design 3 is the best option, but this is only acceptable if the customer agrees to it. They may find it unsafe or even Alivia doesn’t like these kinds of activities. Concept Design 2 meets in the middle of every category and will appeal to Alivia the most for sure but depending on what activities she chooses; the results may change significantly. Design Concept 1 is the favorite for its activities and size, but this results in higher cost and lower mobility which can be a problem. Each Concept has its perks, but according to Alivia option 3 is something she’d love.
Decision Matrix
Overview of Selected Design
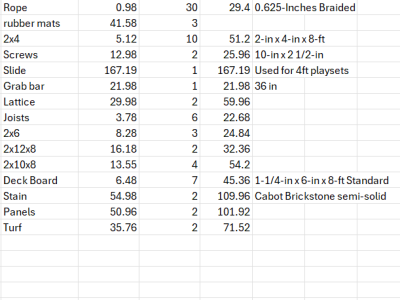
We decided on idea 3 because it follows what Alivia is mostly looking for but is also going to be inexpensive compared to the others because of less need for flooring that may be expensive to buy in a bulk amount. The slide is either going to be a prebuilt slide or alternative PVC piping design. It really depends on the budget and what’s available for the prebuilt slides for what we need.
Describe Design Details
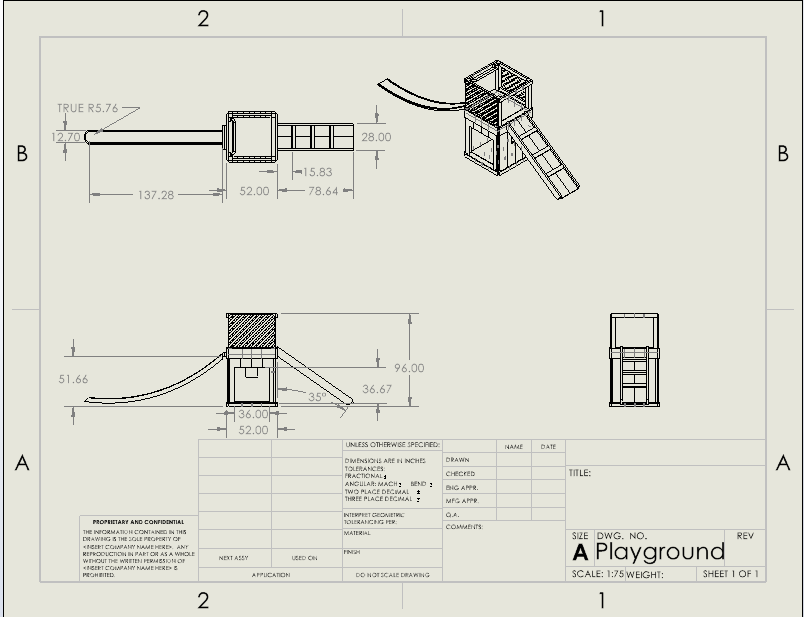
We wanted to make sure the dimensions are large enough for Alivia and a couple other students without going over budget. The slide is going to be longer mainly due to the need for it to be flush with the ground. The wall must also be less steep so Alivia can climb it with minimal leg use.
Engineering Analysis 1
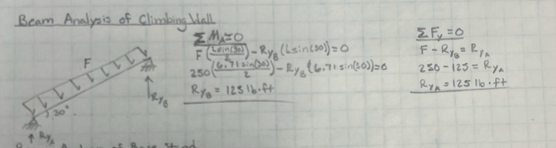
We wanted to look at each section (climbing wall, top, slide) as a beam and do some beam analysis. We treated to force of a student as a uniform load and try to find what the reactions are at the connections for what we assume to be a max of 250 pounds of force per length. we used a 30-degree angle in order to not have it too steep, but this may change, and we will plug in a new angle into the equation.
Engineering Analysis 2
Next, we wanted to look at the same numbers for force but from the top of the product. We looked at the ‘beam’ as a flat surface and again wanted to make sure our build will be able to hold an assumed weight of 250 lbs.
Engineering Analysis 3
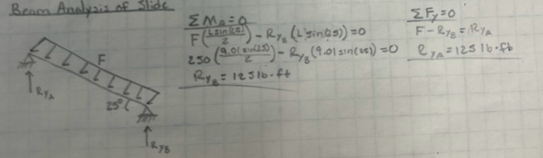
Lastly, we wanted to look at the same numbers for force but from the slide. We wanted to look at the uniform force of 250 lbs. on a slide and make sure the reactions at the one connection will hold our student. We also thought about how the student on a slide may jump on it to create more force, so we need to account for a little more max force.
When we started building our project, we found out that the size of our structure was going to be too tall for the room. To solve this problem, we built it on its side. We did not stand the playhouse up completely until we finished the framing of the playhouse. Once we had stood the playhouse up, we got on top to test if it could hold the group’s weight as well as see if it would shake. It survived all tests flawlessly. Our next step was to sand down all edges and make sure there were no sharp or jagged pieces. We then built the accessible ramp designed for Alivia to be able to climb up. For a better look and to ensure there would be no splinters, we decided to line the inside of the ramp with turf. Our last step before putting all the pieces together was to stain the walls and flooring to ensure longevity. Since the wood we used was already treated, there was no need to stain the rest. We then loaded the structure on a trailer and hauled it to Findlay Elementary to put together. All pieces fit together, and it was time to test our creation.
Testing Results
When we were able to erect the playhouse, we immediately wanted to test what we had created. For our first major test, we decided to get 4 people on the top deck and stomp around. We each then went down the slide individually to ensure it could take the weight of a child. We then put three people on different sections of the ramp and hopped up and down to ensure there were no issues. For our final test, channeling our inner child, we ran through everything to do on the playhouse. Our results showed that our playhouse is sturdy and ready to give Alivia and other children an enjoyable time for years.
Completed Design Photos
Instructions for Safe Use
To ensure the structure’s safety, you must follow 5 steps that we found would help.
Periodically inspect the structure for cracks, damage, and signs of strain.
Instruct students to treat the playground with care.
Instruct students to report any issues, interesting sounds, or injuries that occur so that they may be addressed.
Periodically inspect the structure for signs of animals/aggressive bugs and possible nests.
Close off the playground if there is any suspicion of being unstable.
Project Summary/Reflection
Building the playhouse for Alivia was a meaningful experience that taught me the importance of inclusive design and empathy. I had to rethink traditional construction to ensure the space was accessible, safe, and fun for her, while incorporating features like a ramp, climbing rope, and support bars. Challenges along the way, like adjusting plans and managing delays, only deepened my understanding of the care and attention required to create something truly supportive. In the end, seeing our design come to life made it all worthwhile and reminded me that accessibility is about more than just design; it’s about creating spaces that allow everyone to feel included.