The goal of the project is to design and develop a safe and comfortable bed for an autistic child that that will last for the entirety of his childhood. This website portrays our process in making that a reality. It first covers the situation, which is followed by our concept designs and eventual design choice. The next sections are the 3D model views and Engineering Analyses. That is followed by the bill of materials, fabrication process, and eventual project summary. We found that building an enclosed bed from scratch can be difficult when not using your own home workspace, working with people you don’t know very well, and trying to build it to certain specifications. However, these definitely became learning experiences that each of us have built character on.
Matthew Arrington, Jimmy Stewart, Nathan Bangean, Charlie Yu
Problem Statement
The problem is the current bed is not durable, because the mattress is easily torn, and soaks in liquid. He also breaks the walls and lining of the current bed. We need to be able to provide an access to a otherwise unaffordable medical product.
Design Specifications
The requirements by the family are:
Twin sized bed
General storage
Cushions around
Eleviate biting the mattress
Elevated headrest
Wheels
Netting durable, holes, see out of not enclosed
Doors at the end
Washable
Nanny cam on top
Sturdy at the ground level
Corners padded externally
Extension cord built in high for built in TV/camera
Background Research
A combination of these existing products are what the family desired:
Concept Design 1
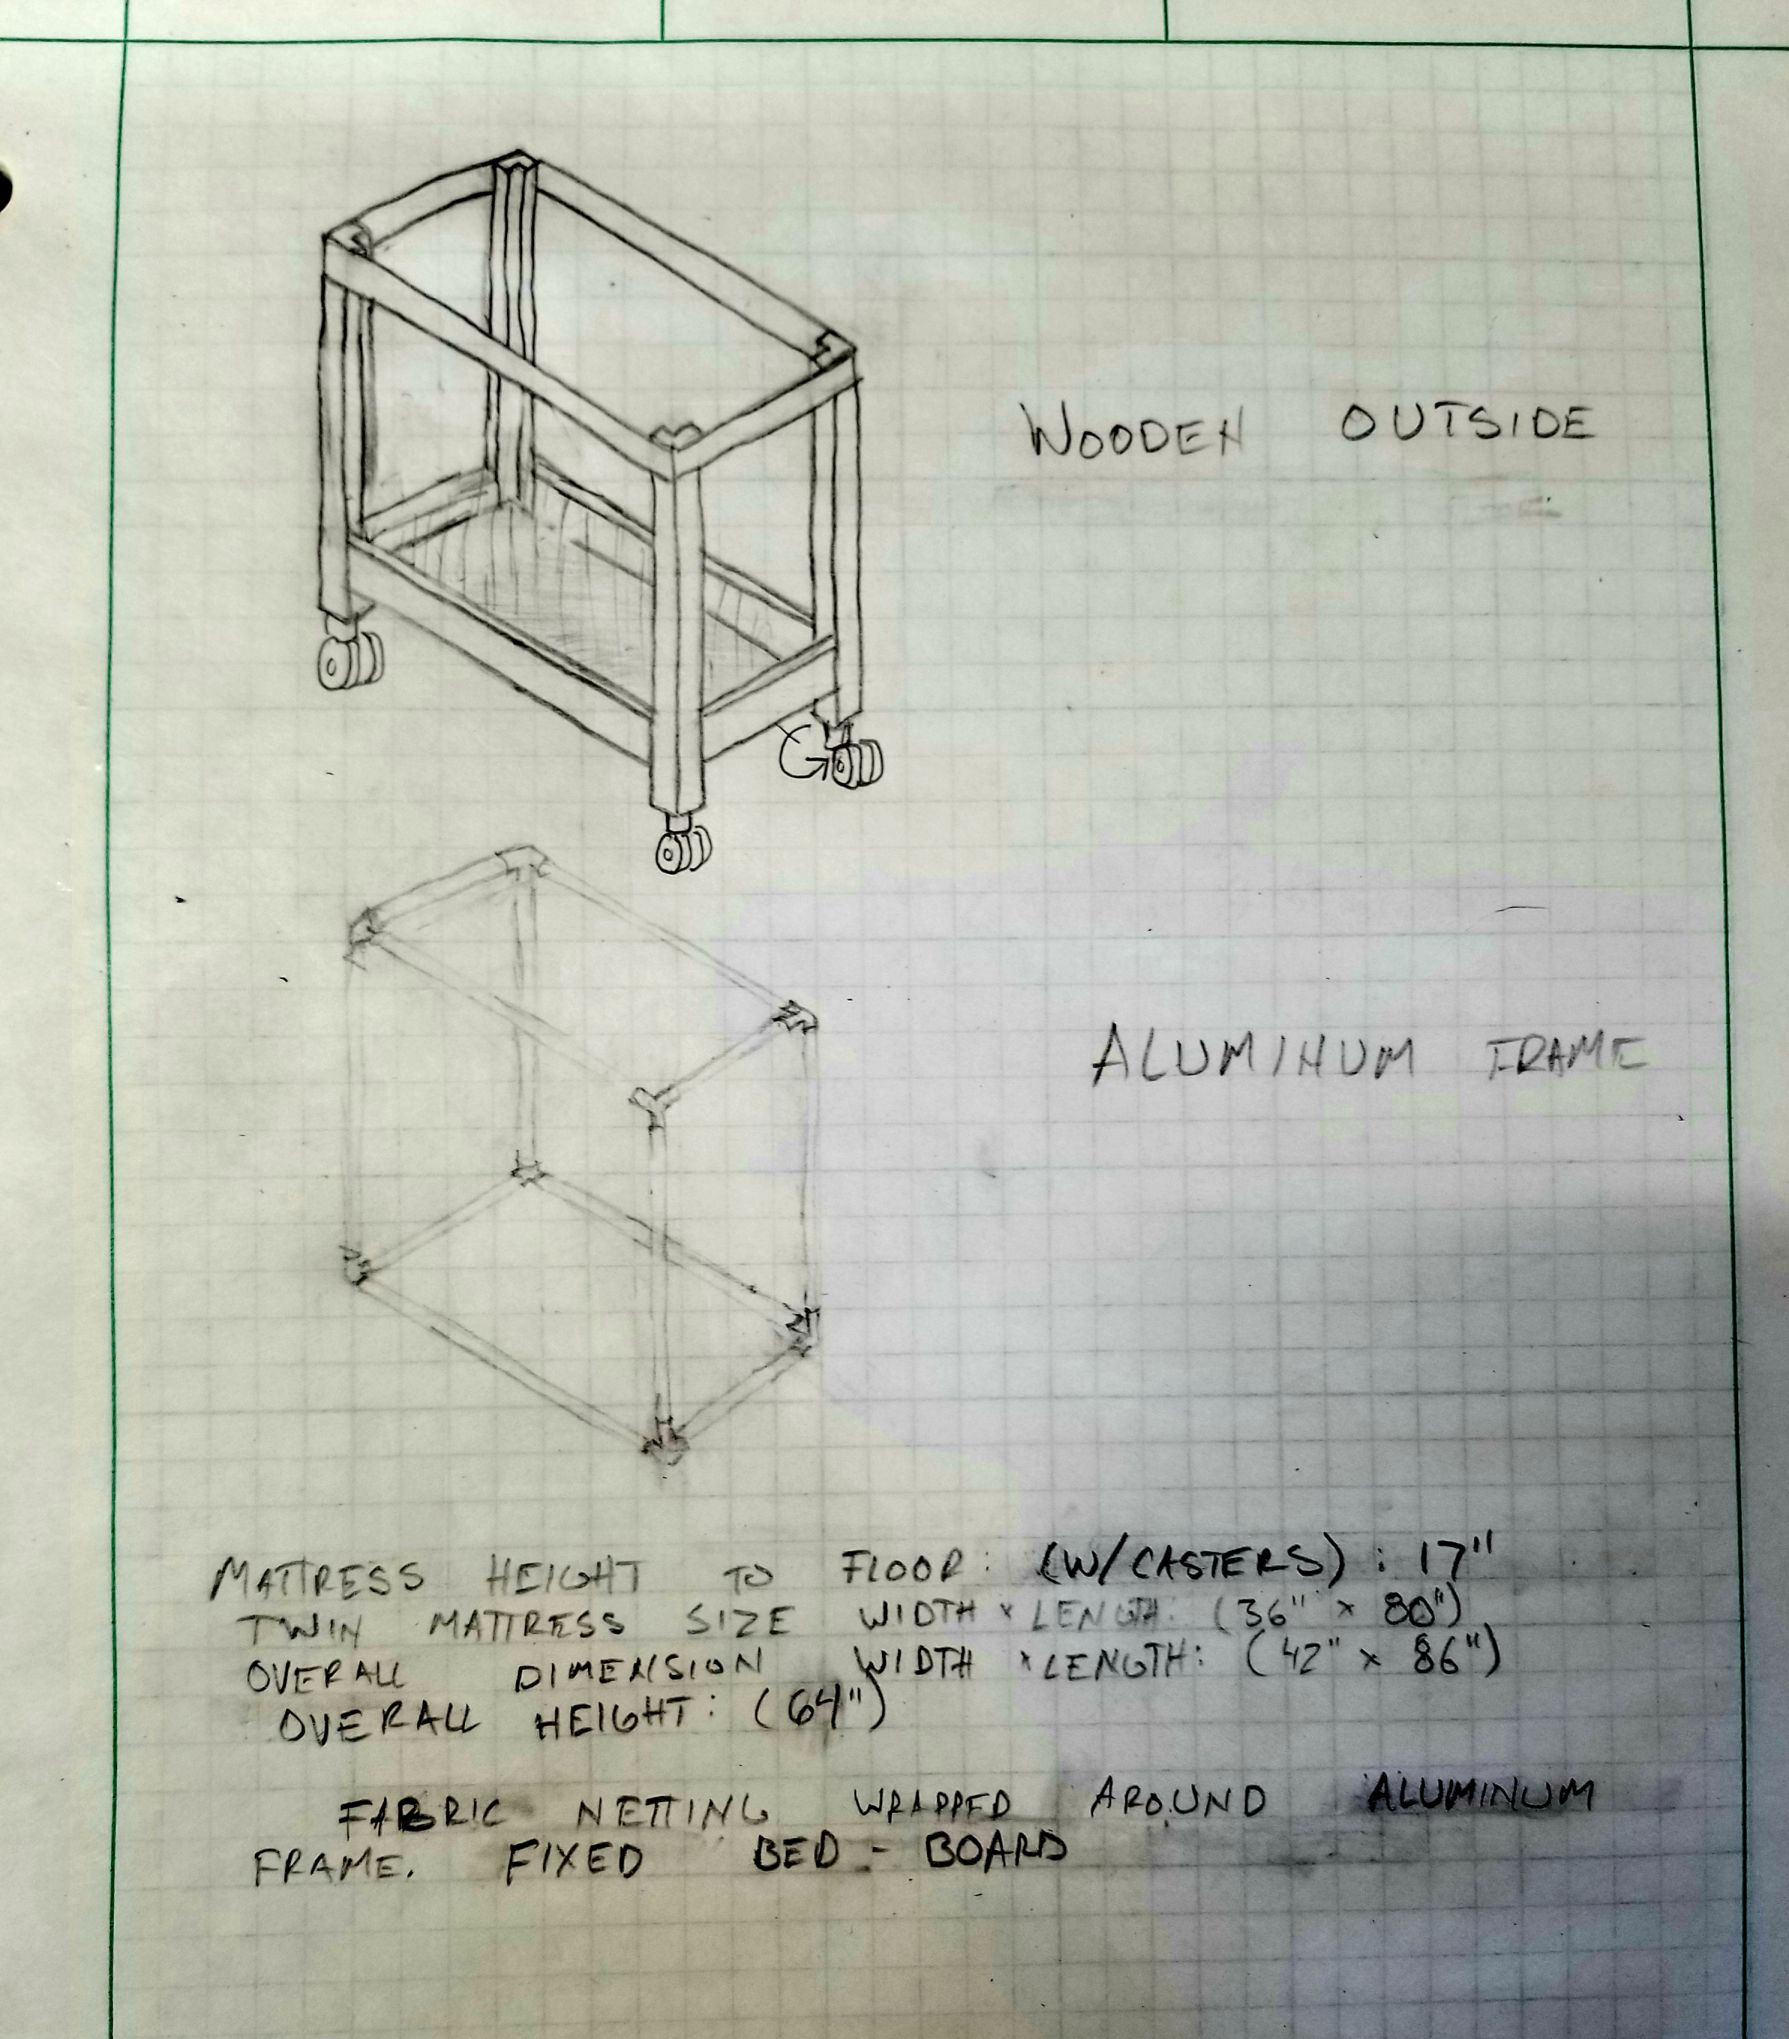
Design 1: Fixed mattress, aluminum + wood, casters. This design features a wooden frame on casters that contains a supportive complete aluminum frame inside. The dimensions are listed on the image.
Concept Design 2
Design 2: Adjustable headrest, aluminum + wood, fixed frame. This design features a wooden frame that contains a supportive complete aluminum frame inside. Fabric runs around the outside of the aluminum frame bt inside the wood. The dimensions are listed on the image.
Concept Design 3
Design 3: Wedge headrest, aluminum + wood, fixed frame. This design features a wooden frame with only four aluminum pipes on the tops and bottoms of the long sides. These will hold the fabric and slide up and down, acting as doors. The fabric is atttached to the pipes using velcro. The pipes are held up with holders as shown. There will possibly be drawers. The dimensions are shown on the image.
Selected Concept Design
Our selected design will be number three. We believe this is our best option that will serve as safe sleeping area for Cooper. The door sides will have mesh sewed into the canvas fabric for breathing and visibility. This design solves most, if not all, of our previous pitfalls with the bed. The Decision Matrix shows our decision process further.
Decision Matrix
Overview of Selected Design
The design is simple but will require work to put it together nicely. We plan to make this look nice so the family will be able to use it in the years to come. Hopefully it won’t turn out too large.
Describe Design Details
Our design features a wooden frame with only four aluminum pipes on the tops and bottoms of the long sides. These will hold the fabric and slide up and down, acting as doors. The fabric is atttached to the pipes using velcro. The pipes are held up with compliant holders that are screwed into the 4 posts. In each of the posts, channels are cut to accomodate the PVC pipes running up and down. We will be using a foam wedge to act as the adjustable headrest. Mesh will be sewed into the fabric for breathability and light. The specific wood type is pine/southern yellow pine. The plywood is blondewood. The inside corners of the posts will have foam to protect the user from hurting themselves. The whole finish will be a dark stain with a polyurethane seal. The fabric will be a blue canvas.
Engineering Analysis 1
Our first analysis shows a simulation of a matress with a human laying on it affecting the bed. The stresses and displacements image portrays the max stresses and displacements present with the lowest factor of safety around 14.2. This analysis was run with forces of 700 N, or about 157 lb, acting downward on each of the slats. We believe this is more than enough to handle the forces of a child.
Pre-fabrication: We need to obtain the correct materials before starting the project. We ran into a few problems obtaining certain items, such as the school won’t cover the TV/nannycam, and walmart isn’t a possible place to acquire materials. However we compromised and ended up getting most items to start the project. The wood was not much of a problem luckily.
Day 1: We sanded and cut the top band of 1’x4′ pieces and the four posts. We submitted a request to 3D print the compliant holders.
Day 2: We continued on the woodworking aspect of the project, cutting and sanding more of the planks. We made some changes to the design (plywood also on back side, support planks on the bottom now along the outside perimeter).
Day 3: We completed cutting and sanding the wood, including adding dowels on the bed slats.
Day 4: We cut and sewed the fabric to the appropriate dimensions, and put in a new 3D print request as the old ones did not work.
Day 5: We finalized the wood pieces, including staining and applying polyurethane.
Day 6: We put most of the bed together (bed slats, posts, braces, PVC pipes), and prepared the rest to be put together on day 7.
Day 7: We put plywood on the sides, cut the mesh for the top, and made an extra bed Slat. We also cut a mattress topper.
Day 8: This is our last day of fabrication. We made foam pads for the plywood and put Velcro on the fabric door.
Testing Results
The bed slats provide good support, and the mattress fits nicely. The foam pads work well, and the mattress topper adds protection and fills up space.
Instructions for Safe Use
On each side of the bed, unlock the the PVC pipe from the respective holders before moving down or up (twist and pull to remove). The fabric is washable.
Project Summary/Reflection
We learned a ton from this project, as none of us have ever put a bed together. It felt nice to provide something this was otherwise unobtainable to a family in need. I think any of us would have this bed as our own. So yes, were proud of it. Thank you Dr. Canfield and Tennessee Technological University for the opportunity.


