This project’s goal is to further develop a mechanism that will help kids with motor limitations play the ukulele.
From left to right:
Jonathan White, Luke Gross, Ryan Heath, and Johann Mostella
Problem Statement
The main goal of this project, as stated in the abstract, is to further develop a mechanism that will allow kids with motor limitations to play the ukulele. This mechanism is referred to as the Easy Fret Adapter. This project was started by a Tennessee Tech student named Ryan Hammons, and we picked up where he left off on this project. Since he had a working version of the design already made, our project had a couple different goals. The first one was to convert the filament of the adapter from TPU to PLA. Since Ryan Hammons design was specifically made for TPU, we had to create different designs of the Easy Fret that would work with the PLA filament, since it is a much stiffer material. The other goal that this project had was to start implementing the adapter into local school systems. This goal was later scrapped though, since we found out after contacting the school systems that they had stopped their ukulele classes for the year.
Design Specifications
Used by children with motor limitations to help play the Ukulele
Needs to be easily printed by teachers
Keys need to make full contact with the strings of the Ukulele
Background Research
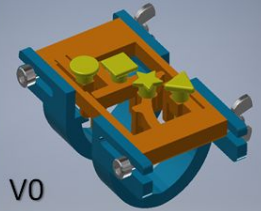
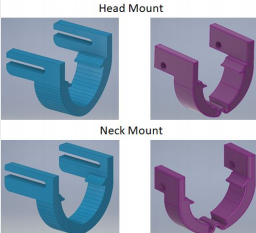
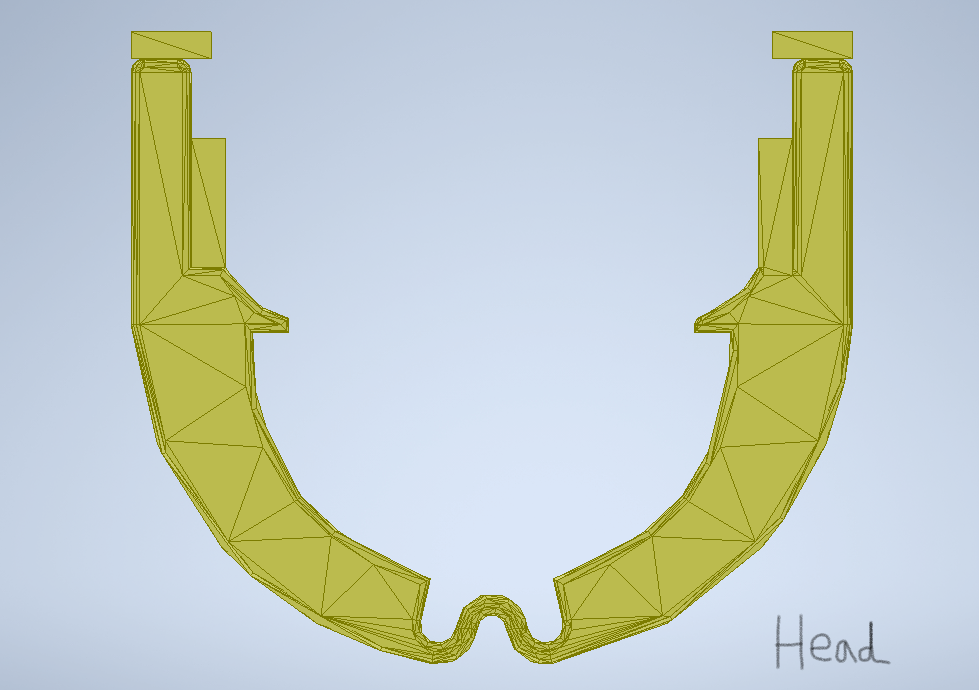
Our project was started by a former student in this class named Ryan Hammons. Since we picked up the design from where he left off, he provided us with all of the designs and research that we needed to continue this project. Ryan’s first version of the design for the Easy Fret, as you can see from the picture, included mounts that snapped over the neck of the ukulele, and shapes as the keys. This was his base design. He got some feedback on this design, and then started to make improvements. The main improvement that he made from version 1 to version 2 was adding a spring-like mechanism to the neck and head mounts. This allows the mounts to have more flexibility, so that way they can stretch over the neck of the ukulele, instead of having to snap it on, which could possibly damage both the Easy Fret and the ukulele. Another big improvement that he made was adding a solid plate underneath the flexible plate. This provides more stability for the adapter. He also took the shapes that were the keys and replaced them with rectangles. He then gave this to Dean Shank at Tennessee Tech, so that way he could get more feedback. He got the feedback, and then used that to make one more improvement on his 3rd version of the design. On his last design, he designed the keys to be snap fits. This allowed the keys to be stronger and stay into place better on the adapter. All of the designs that he printed were printed using TPU filament. Pictures: (V0=Version 1);(V1=Version 2);(Mounts are with Version 2);(Bottom picture with snap fits is Version 3)
Concept Design 1
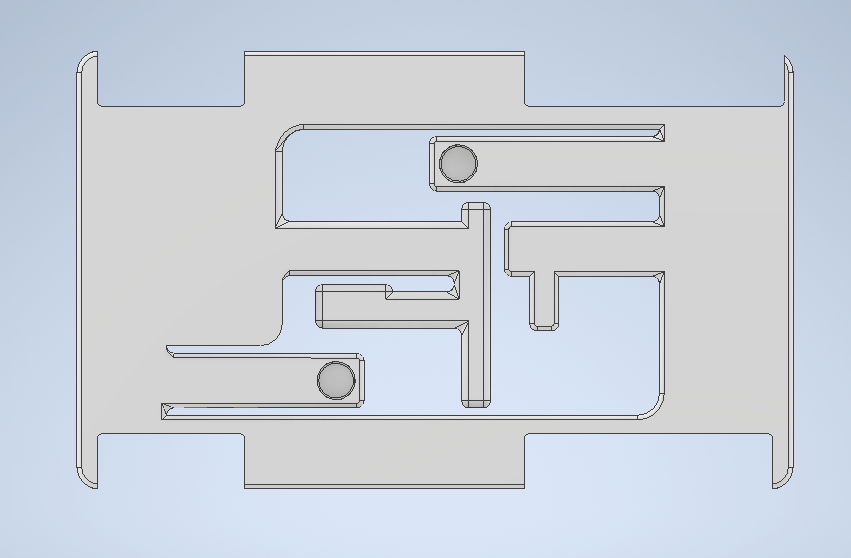
In our group’s first design of the Easy Fret, we took Ryan Hammons 3rd version and made some changes to it. The first change that we made was we removed the hard plate from the design. Since we were printing this using PLA filament, and PLA filament is a lot stiffer material than that of the TPU filament, we removed the hard plate to allow the flexible plate to move more freely and so the keys could also be more mobile. We also took the rectangles and snap fits off of the keys, because one of the improvements that Dean Shank recommended was that the keys be color-coded. So, we added colored stickers to our design over the keys instead of using what Ryan Hammons had. The next thing that we changed was the top and bottom of the flexible plate. We cut out spaces at the top and bottom, so that way the neck and head mounts could fit tighter onto the flexible plate. We had to adjust the head and neck mounts for this to be possible as well, so we made the mounts have a little bit of an overhang on the piece where it snaps on. This allows the mounts to fit like a puzzle into the spaces of the flexible plate. We also added a support piece that sticks out on the inside part of the mounts as you can see in the picture. This allows the adapter to stay more secure to the ukulele, and it gives the adapter more support.
Concept Design 2
After testing this design on the ukulele, we realized that the keys were really stiff on the adapter. The keys would barely move, and if you did try to move them anymore than they would, they would snap. This is due to using PLA filament instead of TPU filament. We had to come up with a way to make the keys even more flexible using PLA filament. So, we took the spring-like mechanism that was on the mounts, and we used that same design and added it to the part where the key connects to the flexible plate. This spring-like mechanism allows the key to deflect more and move more freely. We used the same neck and head mounts on this design as the previous one.
Concept Design 3
After testing this design, we realized the keys moved more freely than the first design, but the spring-like mechanism was too thin and the keys snapped at the base of it. So, on our 3rd design we decided that we were going to make the spring-like mechanism thicker so that way it would be more secure, and wouldn’t snap. If you compare the thickness of this design to the previous one, you can tell that this design’s spring-like mechanism is much thicker. We used the same neck and head mounts on this design as we did on the previous one.
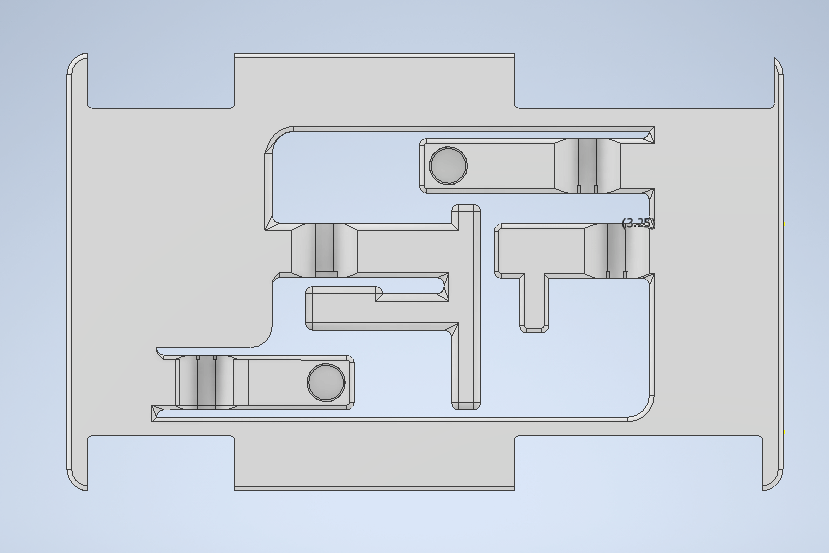
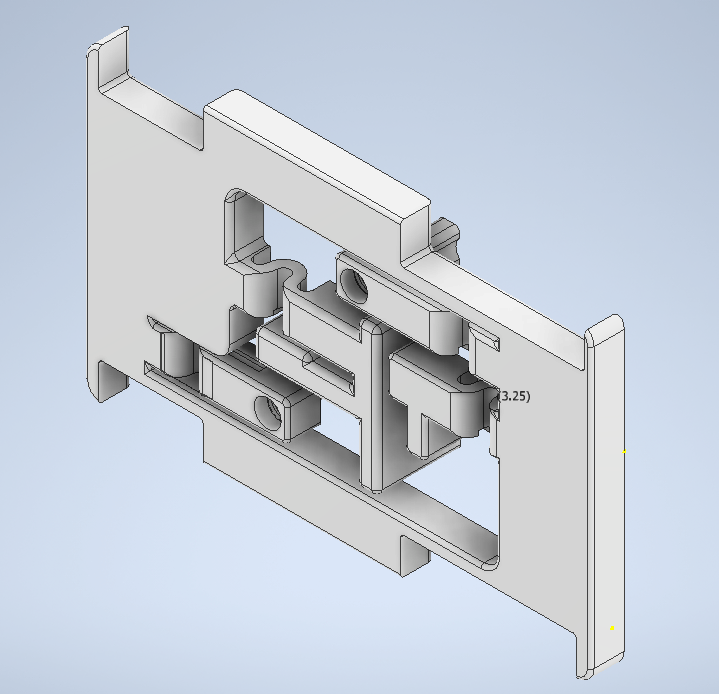
Selected Concept Design
In our final selected design, we added a bridge bar on the F key to press down the F and A minor key to produce the F chord. We also moved the deflection spring further back on the F and A minor key designs to give a smaller angle of deflection and larger beam length.
Decision Matrix
Overview of Selected Design
Made the plate out of PLA instead of TPU so it is easily printed by teachers.
Made spring deflection bridges for the hard PLA plastic keys so that they will bend.
Filled in snap fit holes from previous Flexible Plate design.
Added a free hanging bridge to produce the F chord sound.
Removed buttons to keys so that there is less material to print.
Created a longer beam for the F and A keys to improve the deflection range.
Created a clamping mechanisms on both mounts to hold the plate in place.
Removed previous hard plate and made necessary adjustments.
After each design iteration, we used the TTU MakerSpace 3d printer to print our designs. It took roughly 3.5 hours for each printing job. For the process, we first create a new iteration of a design to improve upon the previous design. We then implement the idea into inventor to create that idea (See Figure 1). After the design on inventor is created, we then personally submit our design into the 3D printers by opening the STL files in the iMakerspace to print the through the 3D printers (See figure 2). In the iMakerspace, once we download the STL file (which is a 3D version of an object), we then scale it to the precise scales so it will fit with the two other files and so it can also adapt with the ukulele frets.


