college of engineering white

Project 15: Feeding Station

Abstract

Brandon is a very capable young man. There are few things he can’t do. Unfortunately feeding himself is a difficult task. Him and his therapist have attempted many different methods to accomplish this task, including using weight resistance and two hand support. Methods using his own hands have not been successful. To gain his independence, we are undertaking the task to build a device with an interface he can use to replace his arms. He enjoys foods like pizza, pasta, peas, corn and pudding. He will be able to lift his favorite food straight to his mouth with the push of a button.

Jackson Bellamy, Zach Bailey, Noah Hardison, Taylor Rich, Mac Garrison

Problem Statement

Brandon has CP and struggles with feeding himself. Our task is to design and build a device in which Brandon can use independently to bring the food from a plate to his mouth. The device will be user friendly, easy to clean, and economical.

Design Specifications

  • Ability to pick up multiple types of food.
  • Maintenance free.
  • User friendly.
  • Replace the need of another person to help him eat.
  • Being able to use in multiple places.
  • Bring food to mouth.
  • Potential to work with condiments.
  • Use with spoon or fork.

Background Research

Obi a 6 DOF arm that scoops up food and brings it to mouth height. It is one of the best solutions for independent feeding but it is very expensive.

  • Robotic arm spoons up portions and brings it to your mouth
  • Utilizes 6 motors
  • A collision detector stops the arm and moves away
  • Reusable, dishwasher safe plate and spoons
  • Operates on rechargeable Lithium Ion battery.

Meal Buddy more cost-effective arm very similar to obi.

  • Customizable speed, spoon position, and bowl selection.
  • Bowls each have a wipe bar to clean excess food and drips from the spoon.
  • Button switch and carrying case.
  • Bowls and base are dishwasher safe.

iEAT robot takes a slightly different approach than the other two. Instead of using a 6 DOF arm it uses a 3 DOF arm.

  • Rechargeable, built-in battery
  • Can be operated with a single button or with the app
  • Settings can be easily adjusted to personal preferences with the app
  • Both the spoon and the plate are dishwasher proof.

Concept Design 1

Concept Design 1 is making use of a 6 degree of freedom robot arm. The arm is programmable with an Arduino to move to designated positions denoted by a coloring system and then brought up to mouth height. We can convert the power supply to rechargeable battery power and increase the portability of the device. The colored cups will be easily removeable and cleanable.

Concept Design 2

Concept Design 2 can be an addition to every concept presented. The idea is using a pusher to center food on a spoon connected to a column containing a screw gear. The spoon can then be elevated to mouth level and easily reached by leaning. This can be purely mechanical with a handle and lever, or can be fixed with power.

Concept Design 3

Concept 3 is a standing base with a plate able to fit under. It has 2 motors, one operating the shaft moving in the vertical direction and the other controlling the angle of the shaft. A fork attached to the main shaft is lowered to the plate and retracted. Then the bevel gear is engaged 90 degrees and the shaft is extended again to be accessible to the mouth.

Selected Concept Design

We selected the food elevator as our final design for this project. This project serves our purpose well while being easier to design and manufacture than the other two. The design is also friendlier to Brandon and will be easier for him to use as opposed to the standing base, as well as being much easier to design and less prone to error than the 6-DOF robotic arm.

Decision Matrix

Overview of Selected Design

This design consists of a food plate to place food on with an elevator on one side of the plate with a utensil attachment to, in theory, collect the food and raise it up to Brandon for consumption. For this setup, the system will be set in front of Brandon, with the elevator directly in front of Brandon. The food will be raised up from the plate and raised to a comfortable level for Brandon to reach forward and eat from. Aspects of the system, such as the food plate and utensils, will be detachable in order to be cleaned after each use.

Describe Design Details

The food plate consists of a food-safe plastic cast. One dish at a time from the meal is placed on the food plate. On top of the food plate, a pusher that Brandon can control is used to move the food to a central spot where the utensil will catch the food. The utensil is attached to an elevator and can be modeled as a cantilever beam to do loading analysis. The elevator consists of a 12-in. lead screw able to raise the utensil to a level that Brandon is comfortable with and be lowered back down to the food plate.

Engineering Analysis 1

The first analysis calculates the lifting force of the screw and motor combination.

Engineering Analysis 3

The third analysis focuses on finding the maximum force that can be applied to push the food before slip happens between the rubber feet and the table.

CAD Drawings

Bill of Materials

Document Fabrication Process

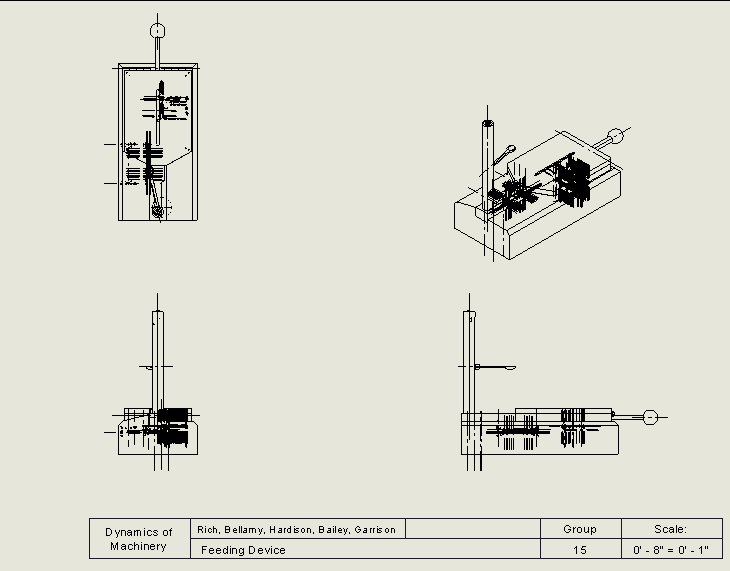
Our fabrication process had several aspects: Printing out the necessary plates, wiring up the motor for the raising process, creating a way to store the electrical components, and then assembling the entire project.

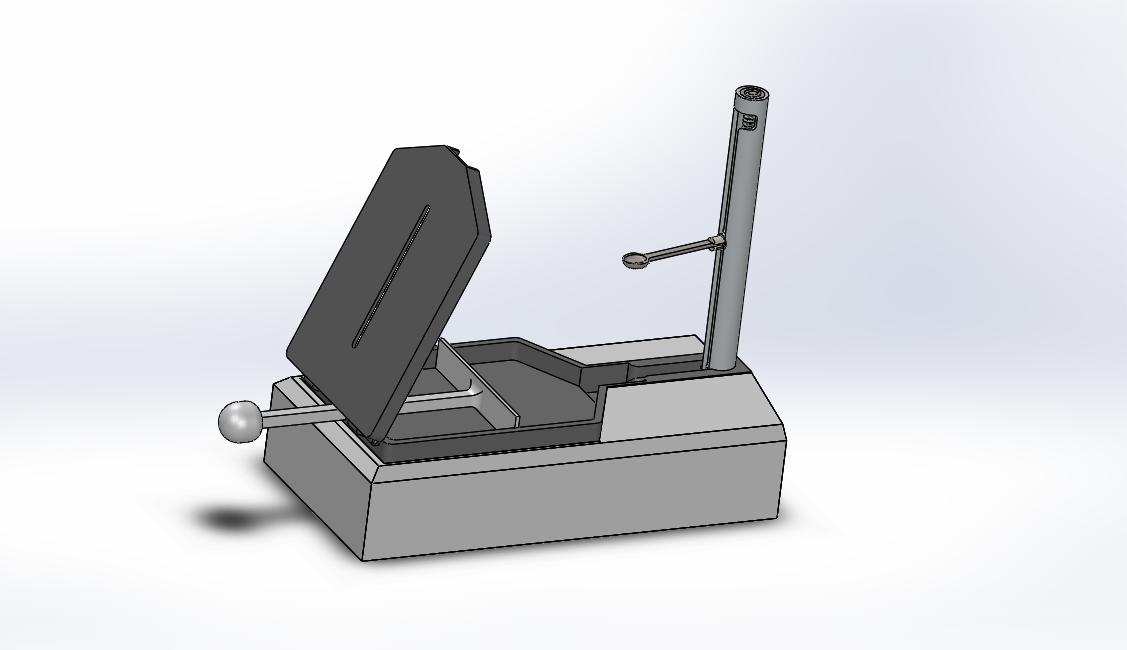
Printing out the plates was the longest aspect of the process. Each print took 12-18 hours but occurred without issue. The food tray, lid, and pusher were at first printed at a 75% scale as a proof of concept. After this, the tray and pusher were printed at a full scale. Since setting food on the filament isn’t the safest choice for a feeding station, we created a mold from the 3D model and poured in a non-toxic epoxy, resulting in a translucent cream colored feeding tray.

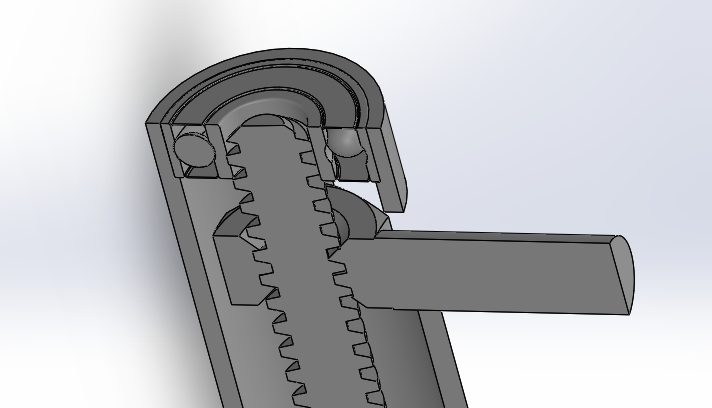
The electrical components required an Arduino and motor control board to power the stepper motor. Two buttons for raising and lowering the spoon were programmed in, as well as a safety implementation to prevent changing the direction mid cycle. A limit switch is placed at the boundary of where the spoon needs to move to stop it from moving too far. The stepper motor was connected to a lead screw, and a bearing placed on the screw to house the spoon. The screw is set inside of a guide to move the spoon to the side of the station as it raises. The end result of this is a homing, raising, and lowering function to the spoon.

To house the electrical components, a wooden frame was constructed using the laser cutter on a thin sheet of plywood. The pieces were then assembled into a box. The box was then stained and holes for the buttons, power switch, motor, and power cord were drilled in. Feet were attached to the bottom to prevent the wood from scratching whatever surface it’s set on.

After the box was made, all electronics were set inside the box. The base plates, having been printed to accommodate the buttons and motor, were set on top of the box and the food tray was placed on last. The tray can be removed for cleaning. The result of this assembly is a station that can have food manually pushed into the spoon and a button pressed to raise the spoon, eat, and then lower the spoon back.

Testing Results

After assembly, testing the machine was a success. The food is successfully raised and lowered, and is stable during the process.

Completed Design Photos

Instructions for Safe Use

The assembly was made with many safety considerations already accounted for. Despite this, here are some things to consider during operation:

Do not get water inside the electric box. This can ruin the electrical components and create an electrical hazard to people nearby.

Avoid touching the lead screw during operation, as it might create a pinch point and injure your hand.

Wash the food tray and spoon after each use.

Project Summary/Reflection

Our design is a culmination of different approaches to the project, and has succeeded in its task. There were many different aspects of the project where some difficulty was had but we were able to overcome it nonetheless.

Semester

2023 Spring