Our goal is to take an existing row bike created for special needs kids and redesign it to better accommodate the students. With a focus on reliability, usability, functionality, and simplicity, we plan on analyzing different designs until we find what is most suitable for the needs of the kids.
From top left to bottom right: George Powell, Greg Truitt, Nick Hoffmann, Jake Akin, Cassidy Morales, Jake Toney
Problem Statement
The issues to be addressed for this project focuses on redesigning the previous row bike to make the bike be able to be used in an effective and reliable manner to provide the special needs kids with exercise and enjoyment each time the bike is used.
Design Specifications
– Bike Size: the previous bike did not fit through the door and had to be manually picked up and turned sideways to fit through the length of the door
– Steering Userability : steering input was done through a linear actuator which turned wheels very slowly so students had to stop rowing to turn wheels.
– Simplicity: make the design for the bike simpler than before so that bike can be completed before the semester end as well as easy to use for kids/ do maintenance if needed in the future.
– Reliability: the previous bike had issues with the wheels locking up due to the chain locking up the gear set, as well as other parts on the bike coming loose.
-Target audience: Bike needs to be able to hold high schoolers with various weights.
-Speeds: Bike needs to be able to be controlled at low speeds indoors but can be increased while riding outdoors to match the pace that the operator inputs into the rowing motion of the bike.
Background Research
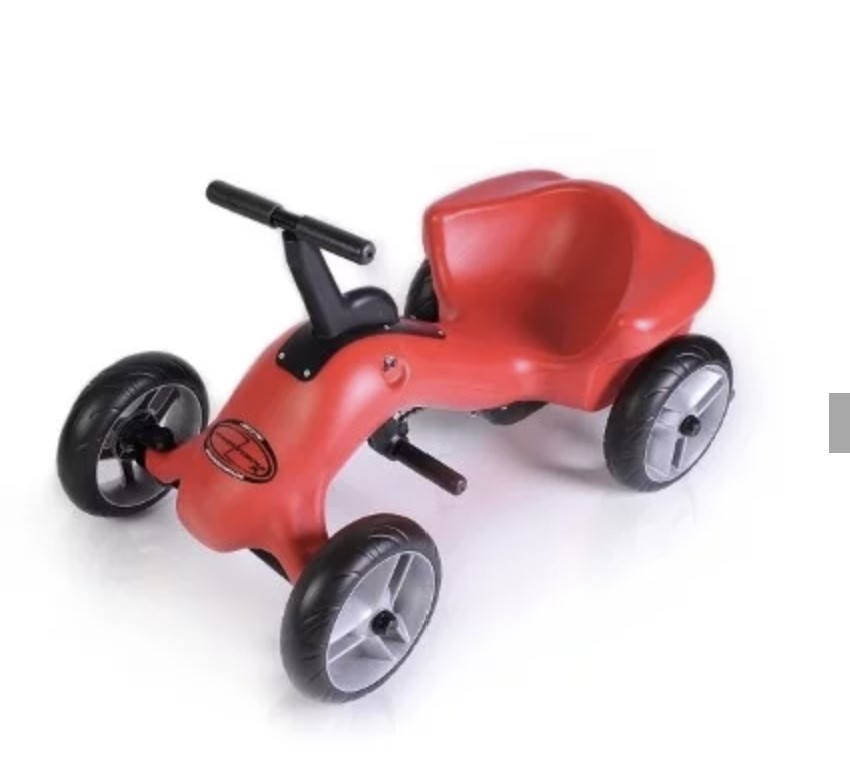
For background research, we looked at several existing row bike designs to generate ideas for our design. We found a bike online called the RowBike Crew 2.0 which is where we got inspiration for the rowing bar’s position relative to the frame along with the general motion of the rowing bike. Our mentor also recommended we check out the pumper car which was more of a car as the name suggests but also let us picture the rowing motion for the bike as well.
Concept Design 1
This concept is a tricycle with an emphasis on peddle steering. The peddles are tensioned to a slot and spring shaft mechanism such that pushing each peddle will turn the bike left or right. Once the peddle is released, the compressed spring will turn the wheel back to a neutral position.
The drive system of the bike utilizes a one-way ratcheting bearing which will produce torque when pulled and spins freely when pushed. This drives a chain connecting to another gear welded to the rear axle with a gear reduction to make the bike easy to row even for the smallest children. The bike seat is also adjustable to be accessible to children of varying heights.
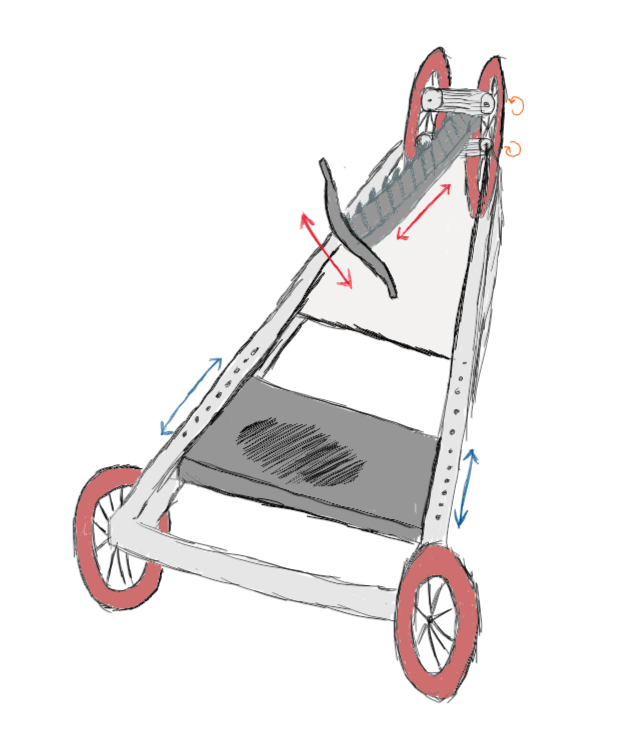
Concept Design 2
This is a 4 wheel tricycle hybrid. The front two wheels are bounded together with cylindrical spur gears fitted with one-way bearings allowing for front-wheel drive. The wheels are also free to pivot for steering. The seat is on a slider free to slide forward and backward in order to allow the user to have a natural rowing motion when riding.
Concept Design 3
This design features a modified approach to providing the bike with motion by use of sets of different sized sprockets and a spring rather than utilizing gears in mesh.
This design also features a change in the steering system for the bike. One of the issues with the previous bike was the steering as the students had to stop the bike to turn the wheels in each direction. The actuator used to control the steering would also turn very slowly. We as a team decided to use cable steering instead to simplify the steering process and make it more user friendly for the students.
The last important feature of this design is the implementation of the sprockets. By using a clutch system, the user will be able to disengage to gear system to allow for the bike to roll backwards without locking it up. This is done using a dog clutch that can be engaged/disengaged using a lever. This will make for a more user friendly experience for the students.
Selected Concept Design
After considering all the designs within the decision matrix as well as the team, we decided to go with concept design 3 as it would be the most viable option based on the rankings below in the decision matrix.
Decision Matrix
Overview of Selected Design
This shows a general view of the design we chose to pursue.
Describe Design Details
Wheels & Frame- The bike will use 20 in. spoke wheels to allow for durability of each wheel. The same frame will be used from the previous group’s project with modifications to the steering and gear system as well as small chances to increase durability and reliability. The bike will consist of 4 wheels that are driven by the back wheels connected by the chain.
Row bar & Handlebar- For the row bar, we decided to switch from round tubing to square tubing as well as make the row bar 30 in. in length to allow for more leverage for the kids to use for the rowing motion of the bike. As for the handle bar, we will be reusing the handle bar from the previous group’s project as it is still in good shape and is made of an high strength aluminum alloy which is perfect for durability. The kids will use the lever on the handle to engage the brakes on the bike.
Cable Steering- The steering for the bike will be accomplished by use of heavy duty cables as the cables will be mounted to a plate with pulleys at the top of the row bar and at the front on top of the fork. This will allow for quick responsive turning that can be easily be done by turning the handle bars.
Sprockets w/ spring and chain- To accomplish motion to the wheels with the rowing bar, our design will use a trio of sprockets with a chain wrapped around each sprocket. We decided to mount the largest sprocket to the rowing bar and mount the smallest sprocket to the rear axle along with a sprocket size in between towards the center of the bike. The chain will mounted to a spring at the end of the sequence to allow for the rowing bar to return to equilibrium and so that the chain will stay tensioned.
Engineering Analysis 1
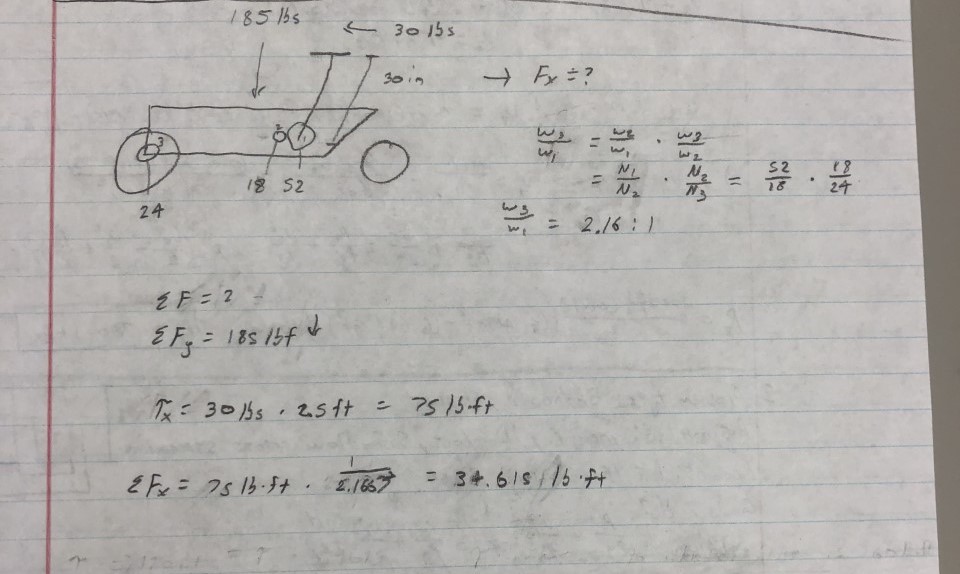
For this initial engineering analysis we wanted to look at the reaction forces applied on the wheels if a fairly large load was put on the seat using determined measurements of the frame.
In this analysis we are measuring the torque output assuming 30lbs can be pulled. To find the torque we need to find gear ratio as in the following picture.
Engineering Analysis 3
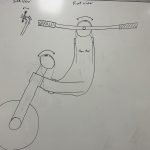
In this final analysis, we looked at the amount of force it would take to bend the handle bars. Using shear and moment analysis, and the bending stress equation, you can represent pulling on the handle bars as a simply supported beam with a singular force in the middle. Since 100lbf is less than half of the yield stress of the aluminum, I can conclude the handle bars are more than strong enough for the bike.
For proper use of this rowing bike please use the following instructions:
Be sure the user is familiar with the locations of the brake, rowing bar, seat belt, and foot pegs as well as how to use each of these.
Pull the rowing bar at a steady pace to ensure proper speed and safe use.
Keep and hands and feet away from any moving parts including the wheels, sprockets, and chains with the bike is in motion.
To move the bike backwards, get the bike to a complete stop and pull the lever located under the seat. Then the bike can feely move backwards and be sure to follow the same procedure the engage the clutch to allow the bike to row again.
If any parts or mechanisms happen to break or fail, discontinue use of the bike until these issues are fixed to ensure the user keeps safe.


